

I have a folder full of drafts but this is what I want to write about today and I have some time to do it! Here’s everything I have to say about sewing the Ruby Vest.

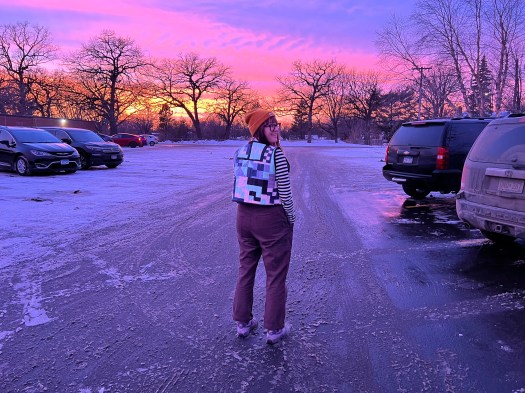
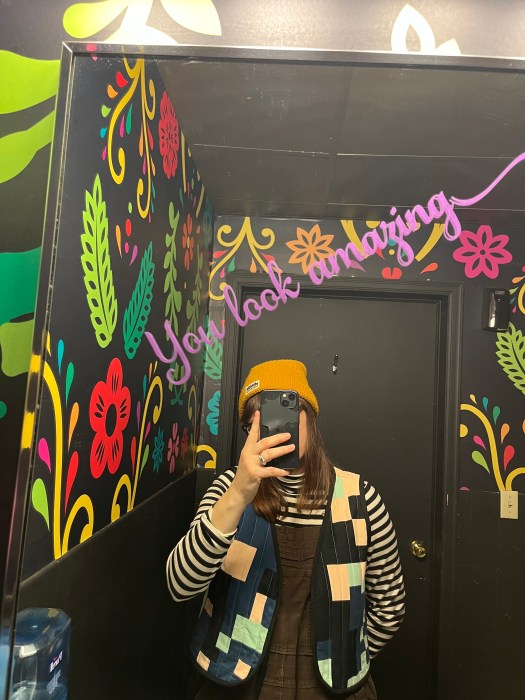
The Ruby Vest is a very popular make among home sewists, and for good reason–it’s cute, it’s fast, it’s reversible, it’s customizable, and it’s very beginner friendly. Check out the hashtag #rubyvest on Instagram and you’ll find hundreds of vests and they’re all so cute. I would venture a guess that most people weren’t vest people before making this vest. Now we are. The last time I owned a vest was in high school–an off-white puffy Roxy one that I tried to use in lieu of a coat but ya know that never works. Having a vest to use to accessorize an outfit is much better.
Print The Pattern, Tile It Out, Tape It Up, Cut It Out

This pattern doesn’t come in a physical copy that you can buy from a store, it’s PDF only (or projector files). I am coming around to print-at-home patterns, and one reason why is this pattern allows you to open the PDF in Adobe, turn off the sizes you don’t need (each size is on a different layer, you just turn off the extra layers) and print out ONLY the size you are cutting! This was a revelation for me. It makes cutting the pattern a cinch, I wish all print-at-home patterns had this feature. Until I get a projector, this is the next best thing. If you’re a little confused about what I mean, Syd made a YouTube tutorial on how to print and tape your pattern together and she walks through how to turn off the sizes you don’t need so those don’t print.
Choosing My Materials
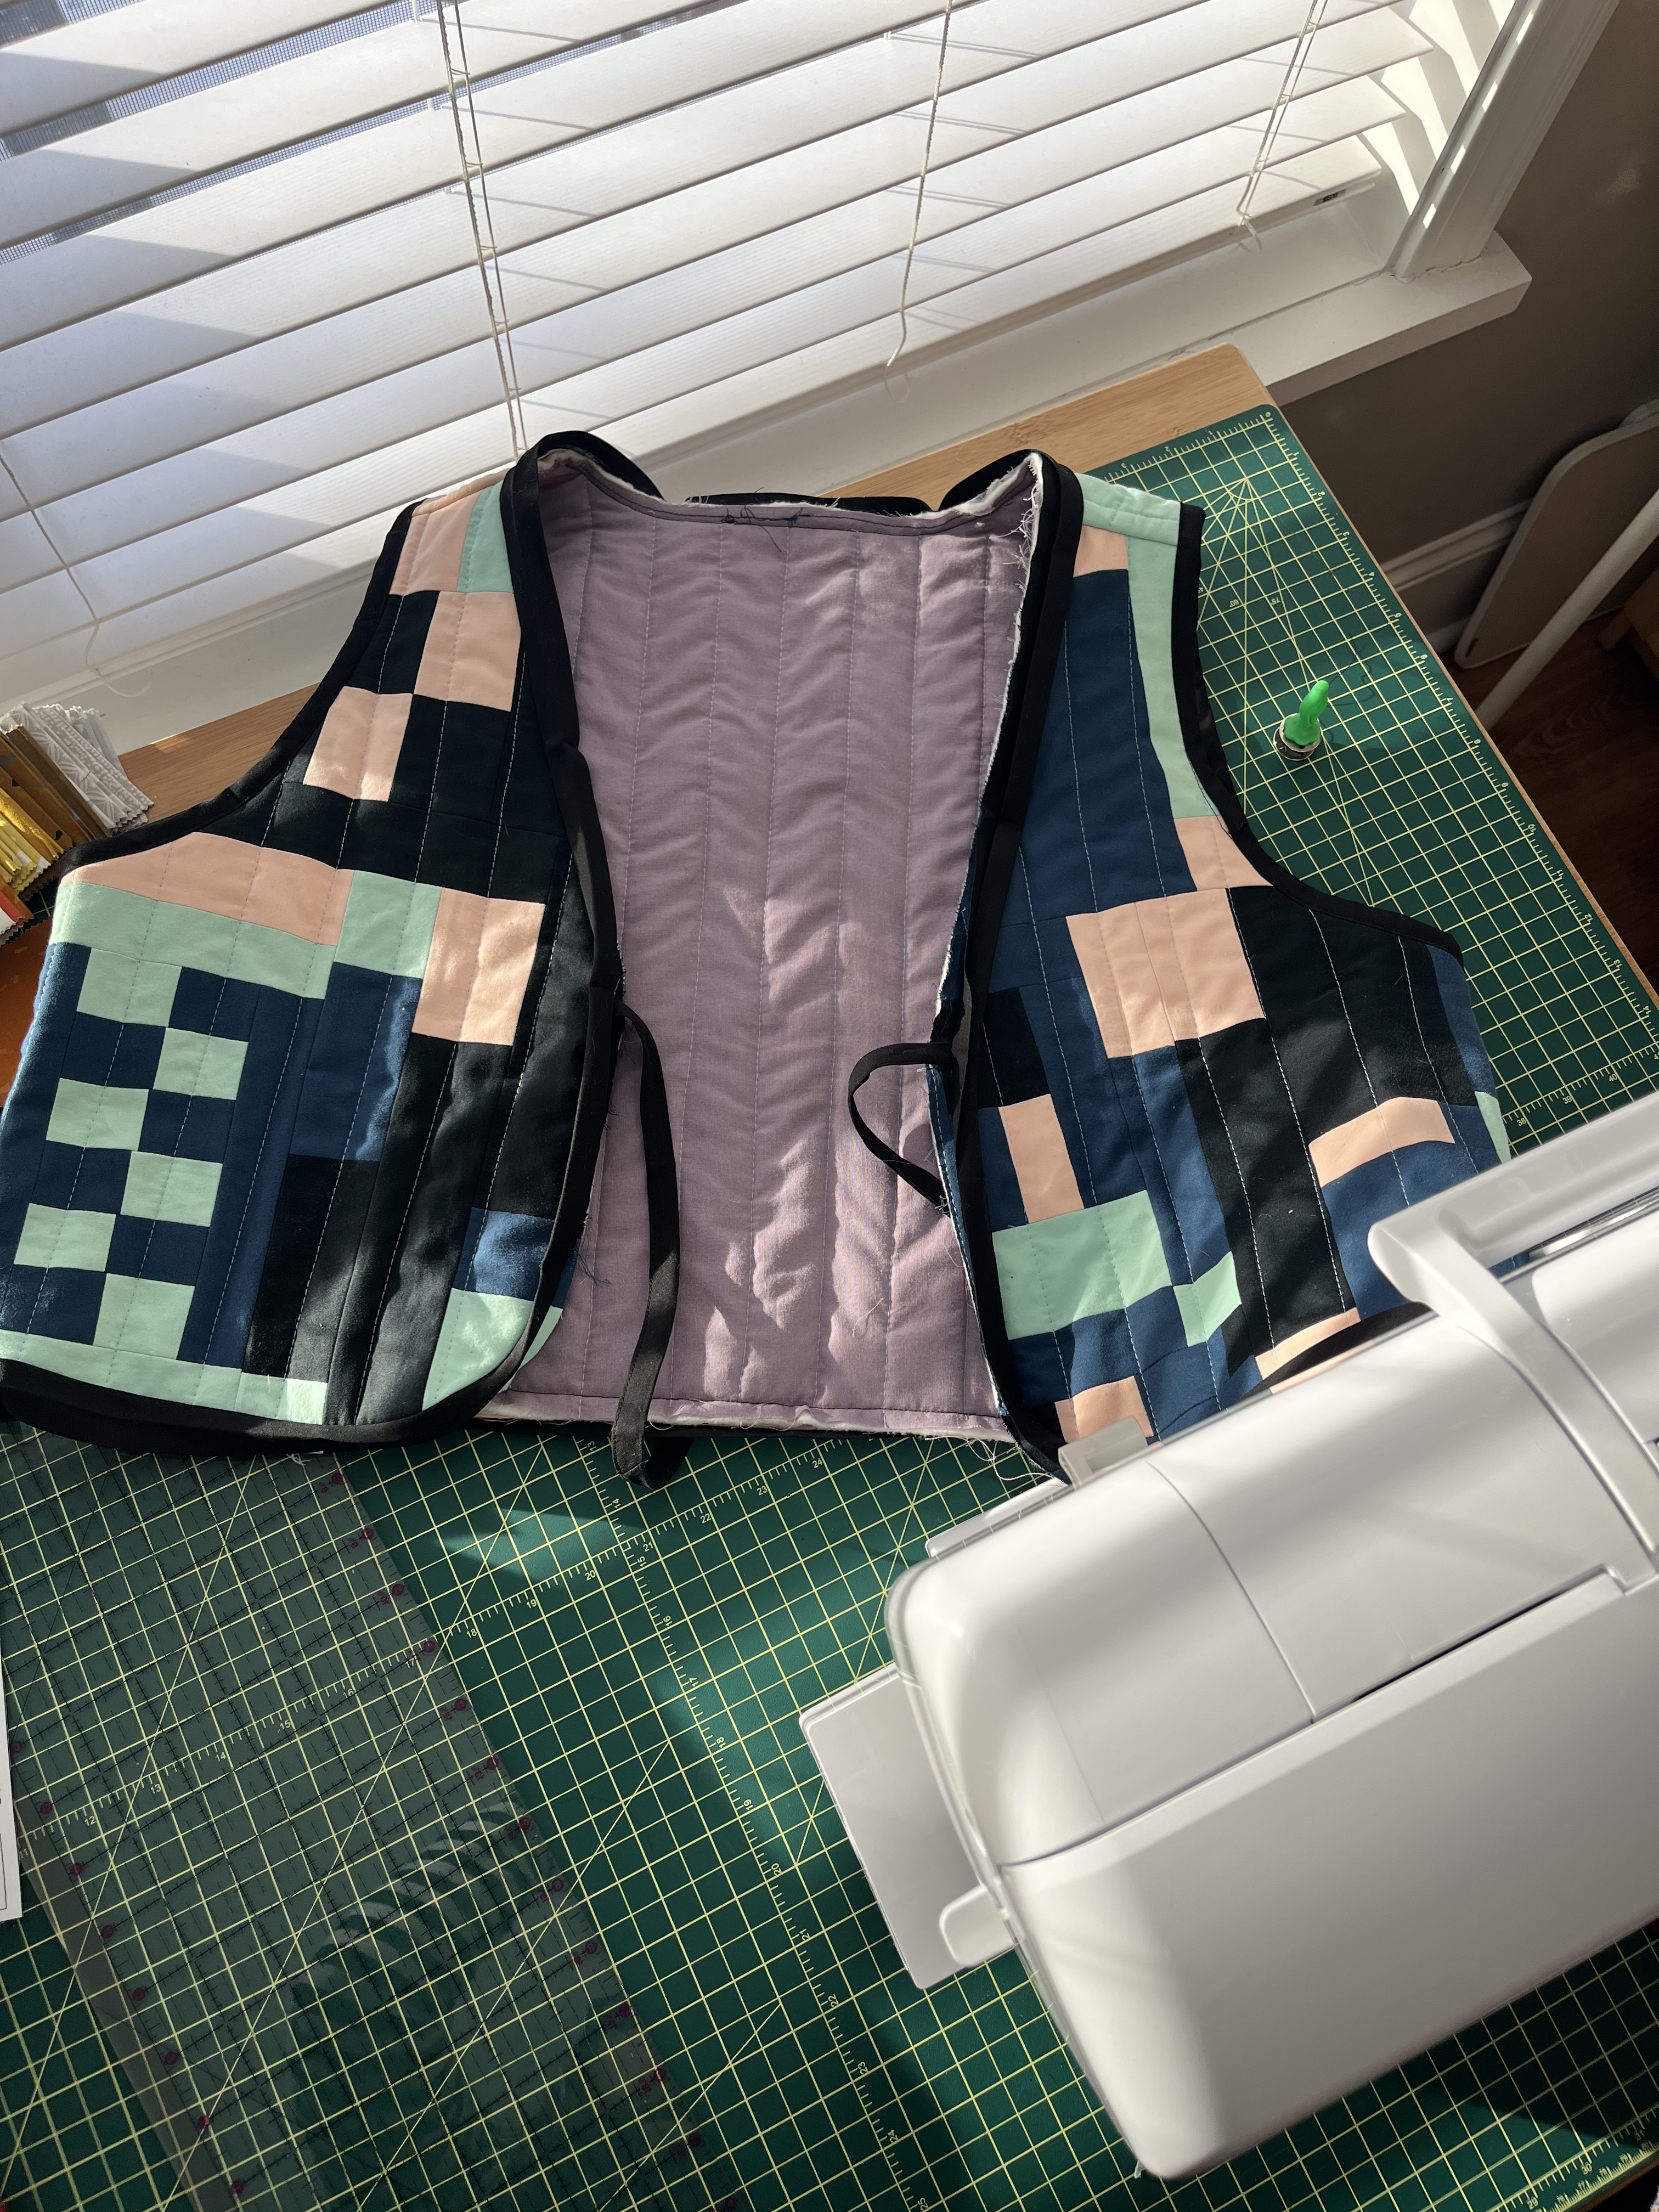
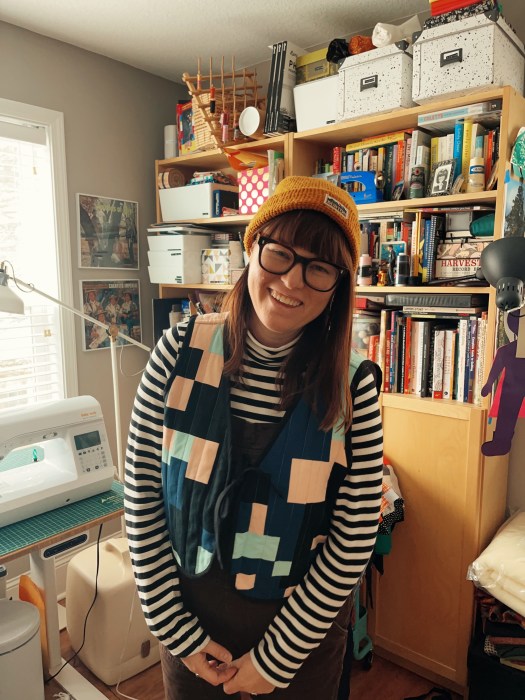
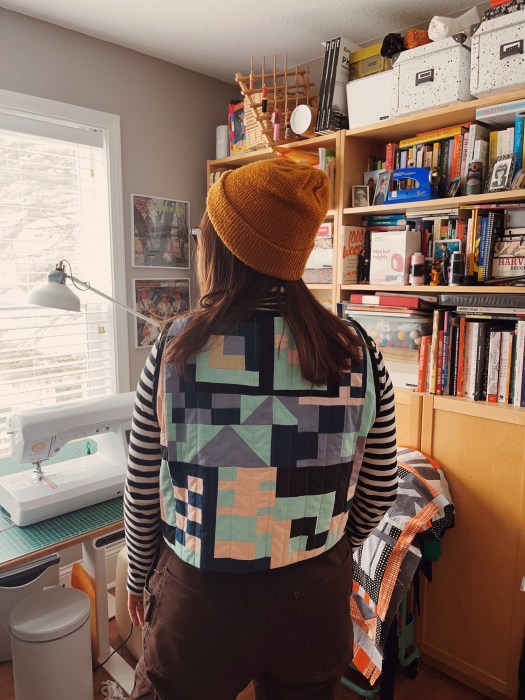
I always have a hard time starting something when it’s a new skill. One thing that helped launch me into this project is I decided to use what I had and not be precious about it. I tried out some of my yardage and couldn’t puzzle out how to cut all of the pieces from what I wanted to use, so then I turned my attention to a panel of improv quilting I did summer of 2024 from some scraps I thrifted. I’m nearly positive these scraps were once sheets. Most seem like cotton, some might be cotton/poly blends. The piece I had started making wasn’t quite big enough for the back so I added on to it. I got lazy with the front panels and mostly just did improv squares but it’s kind of a nice contrast to the busier back. I don’t regret it. When I finished the back piece and held it up to my back I realized the ruby vests I gravitated towards the most were cropped, so I went ahead and hacked off a few inches (hours of work!) and then continued to make the front panel pieces at the cropped length. It was the right move! I like the cropped length so much.
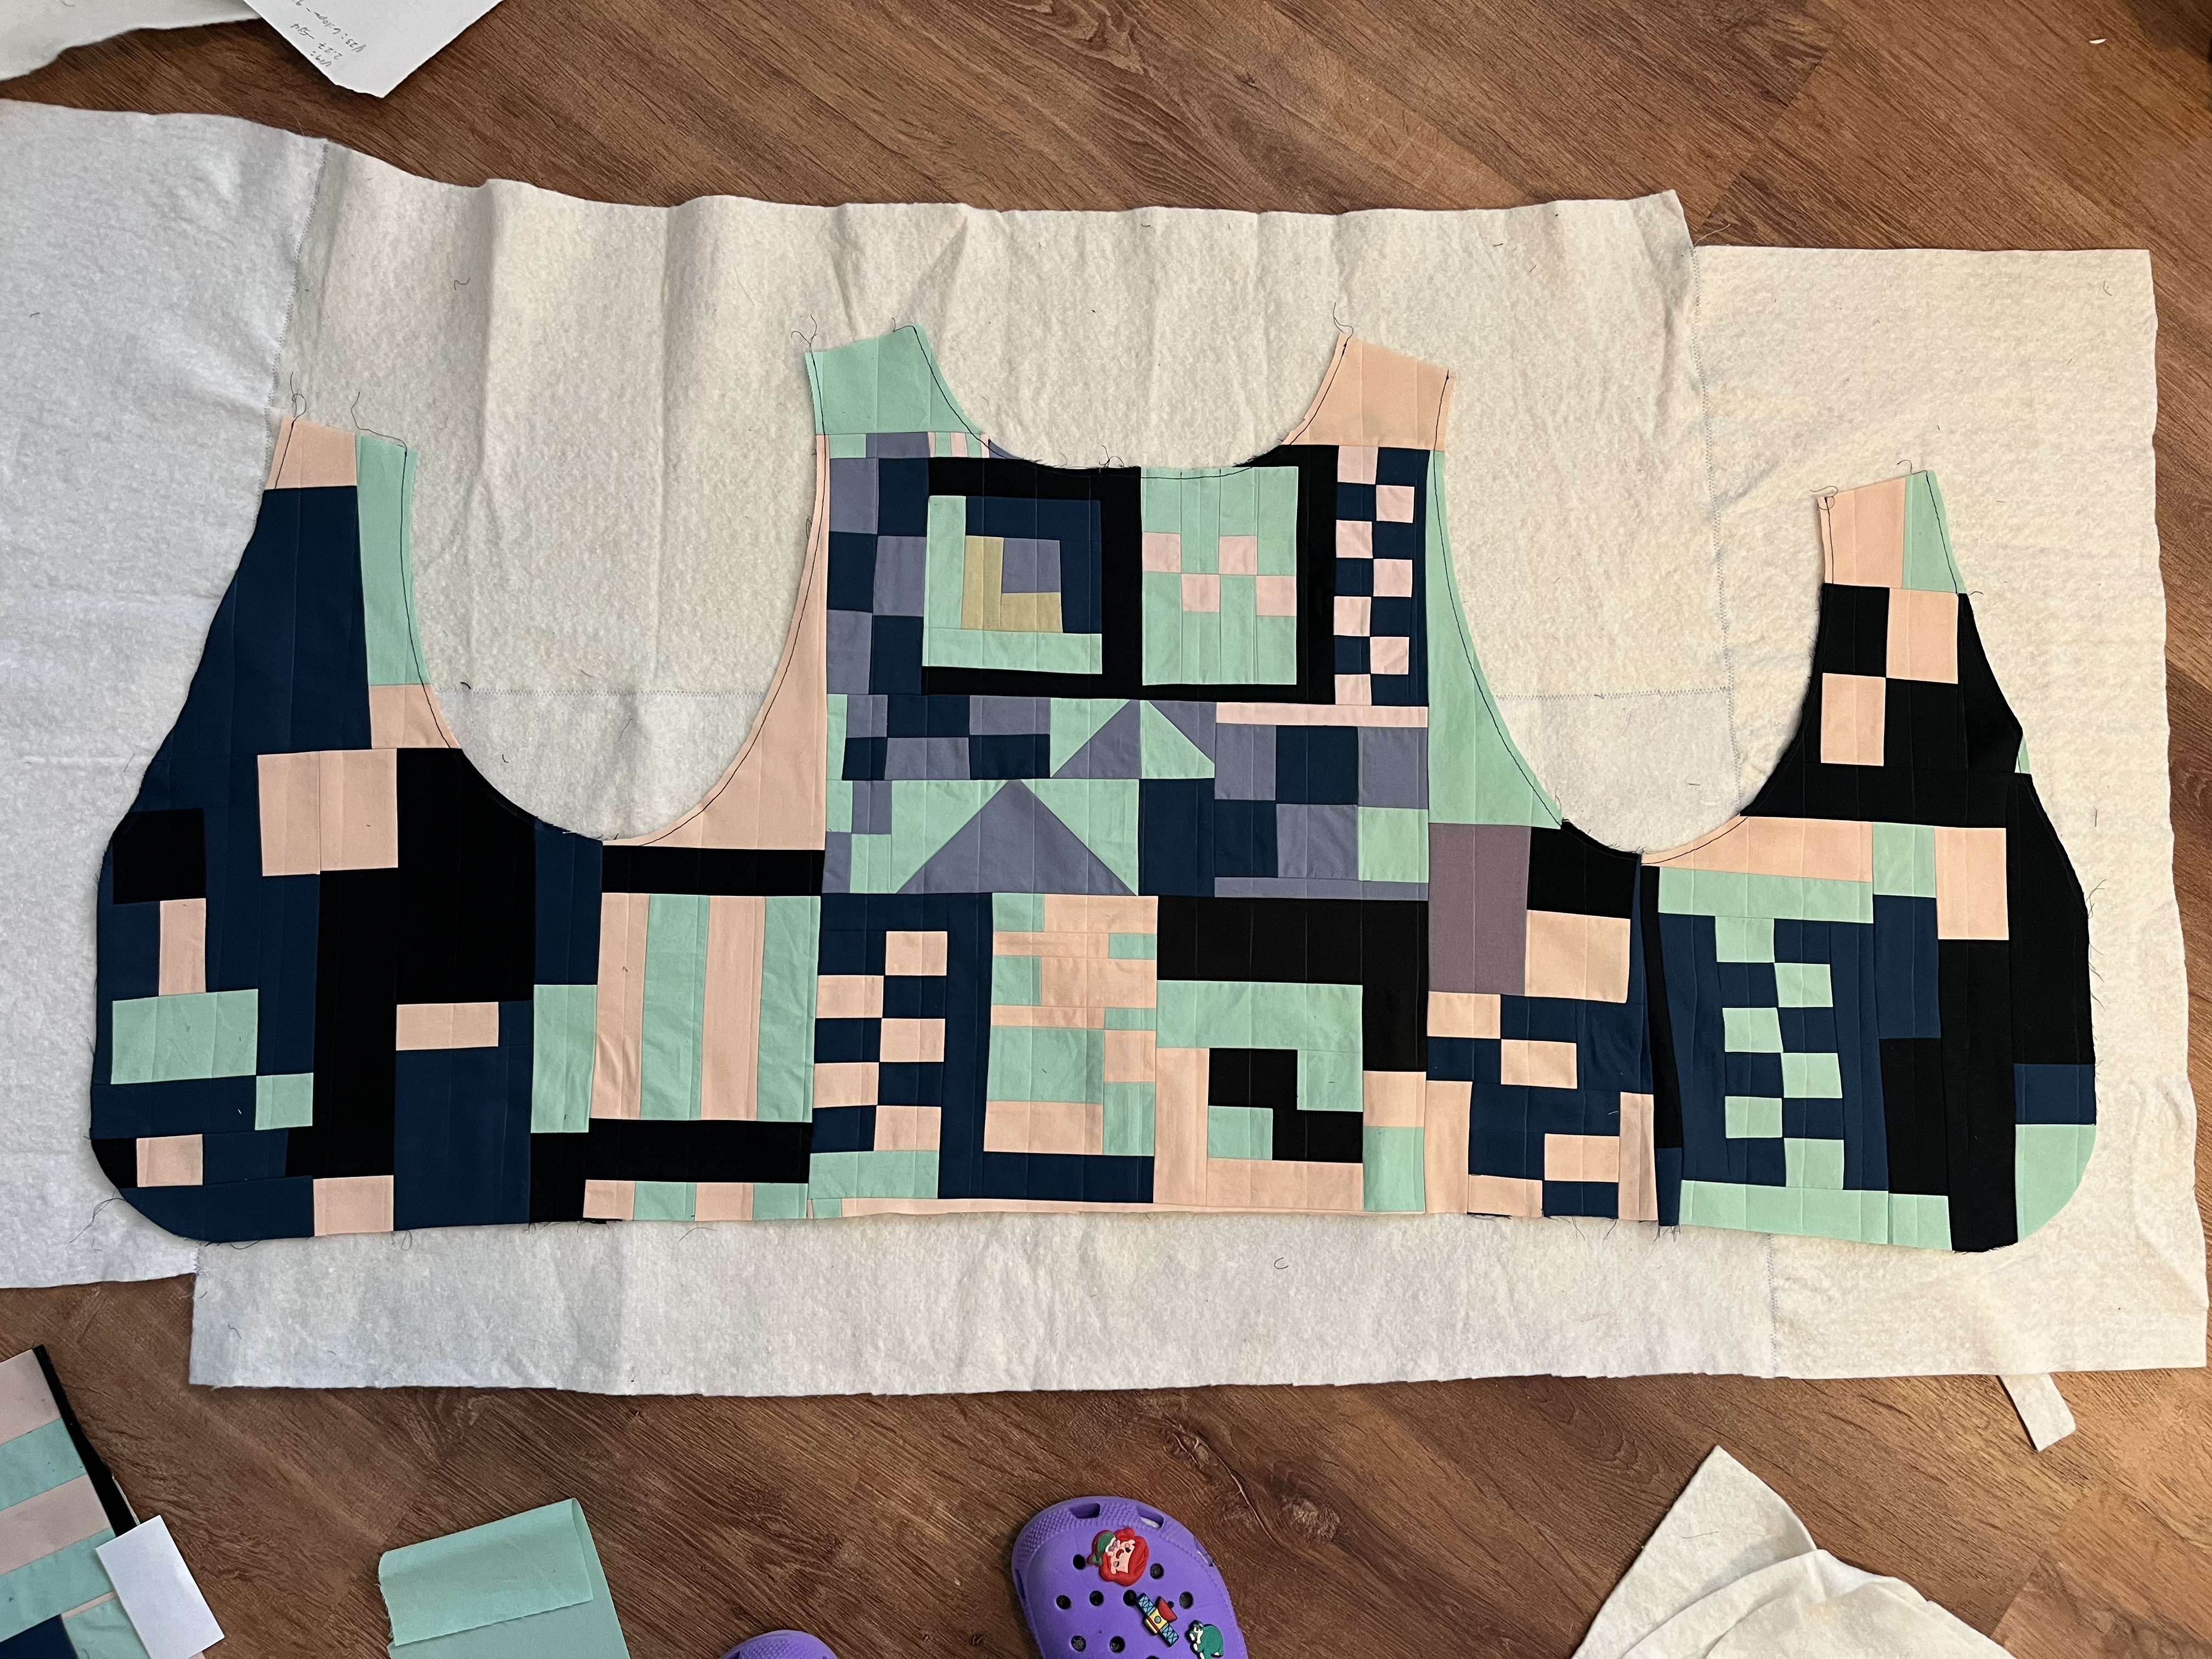
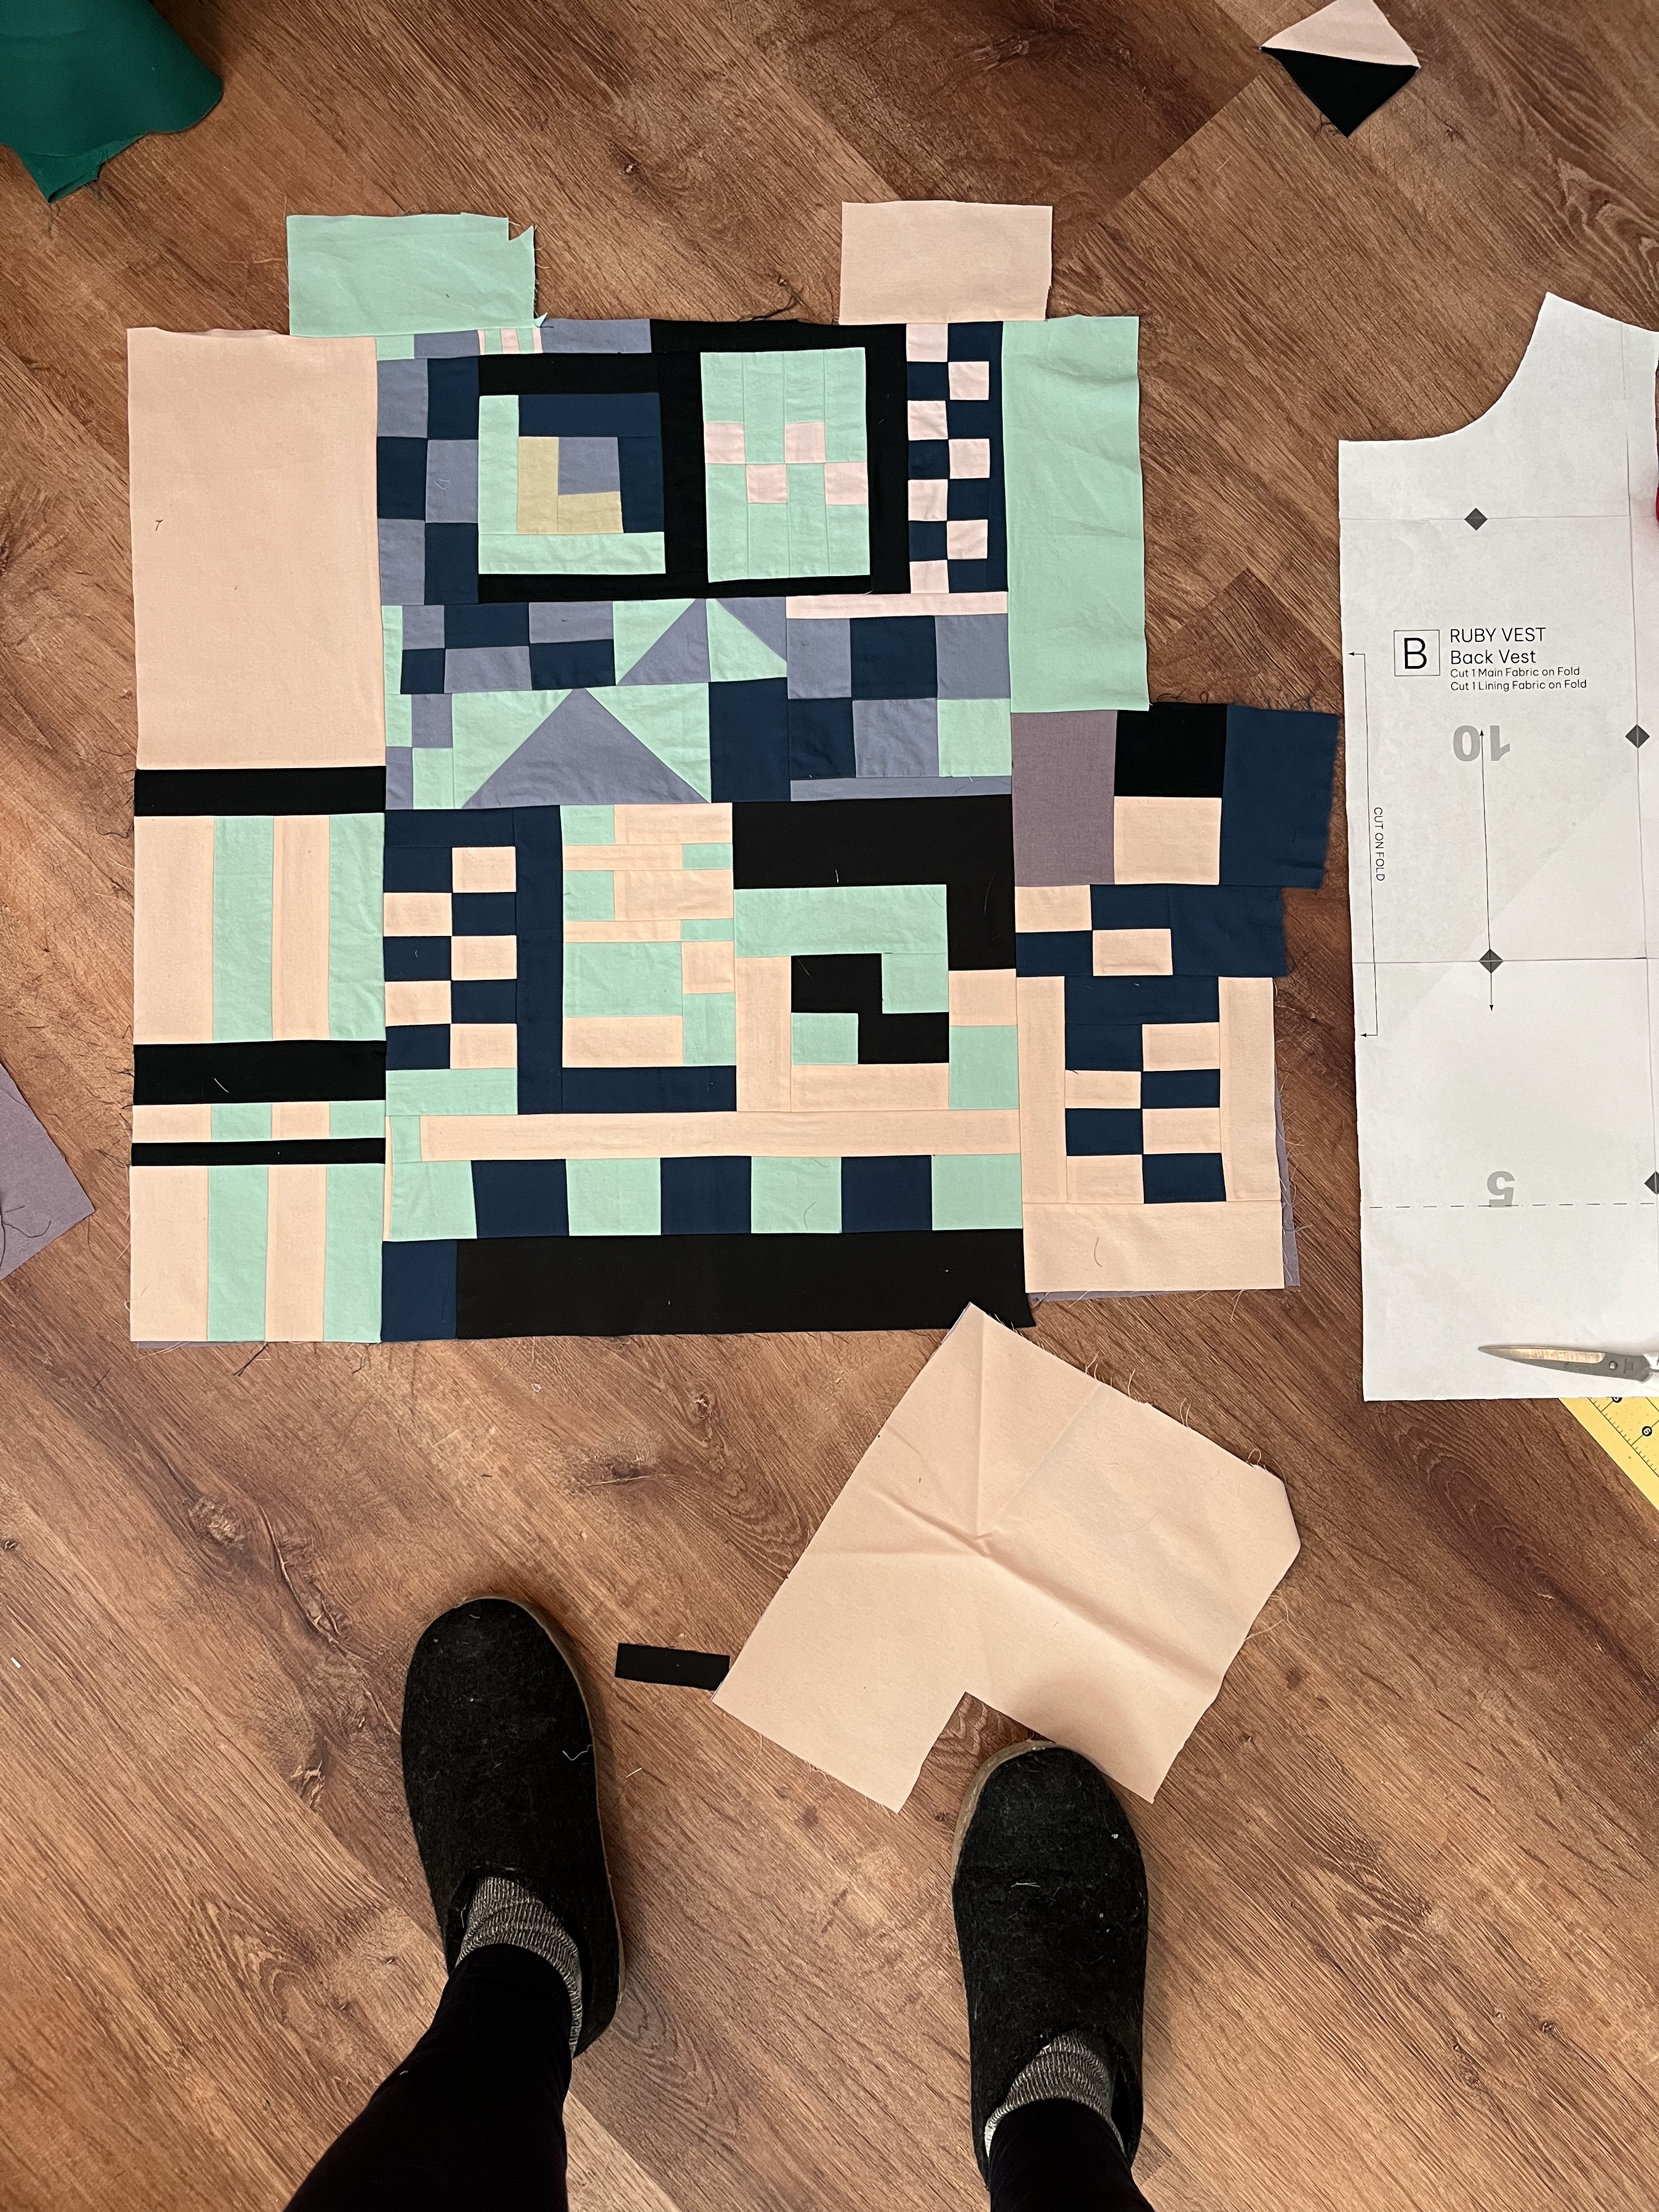

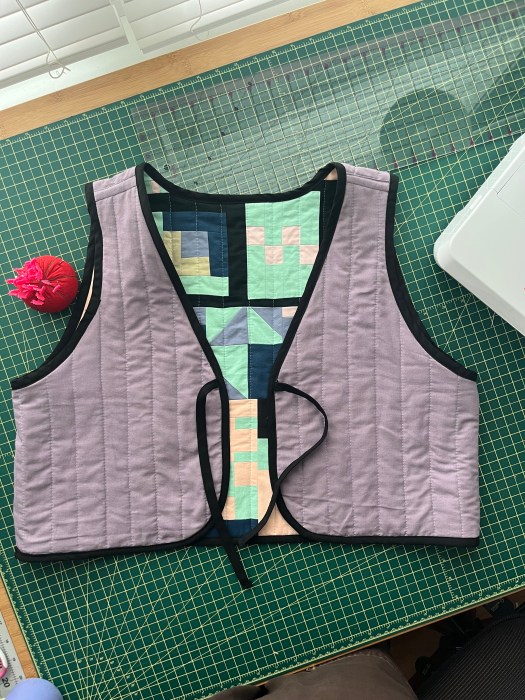
Aside from the thrifted scraps I used for the front main pieced fabric I used a purple thrifted sheet for the interior fabric. I really didn’t want to buy new batting just for this project so I made some frankenbatting by zigzag stitch sewing together some batting scraps from previous quilts. I lined them up so nicely initially but in the end they didn’t butt up to each other super well and came out a little short on one side. It wasn’t a big deal though, I was able to lay the splayed out vest and just cut around what I needed. So happy I could use up what I had!
Quilting It Up
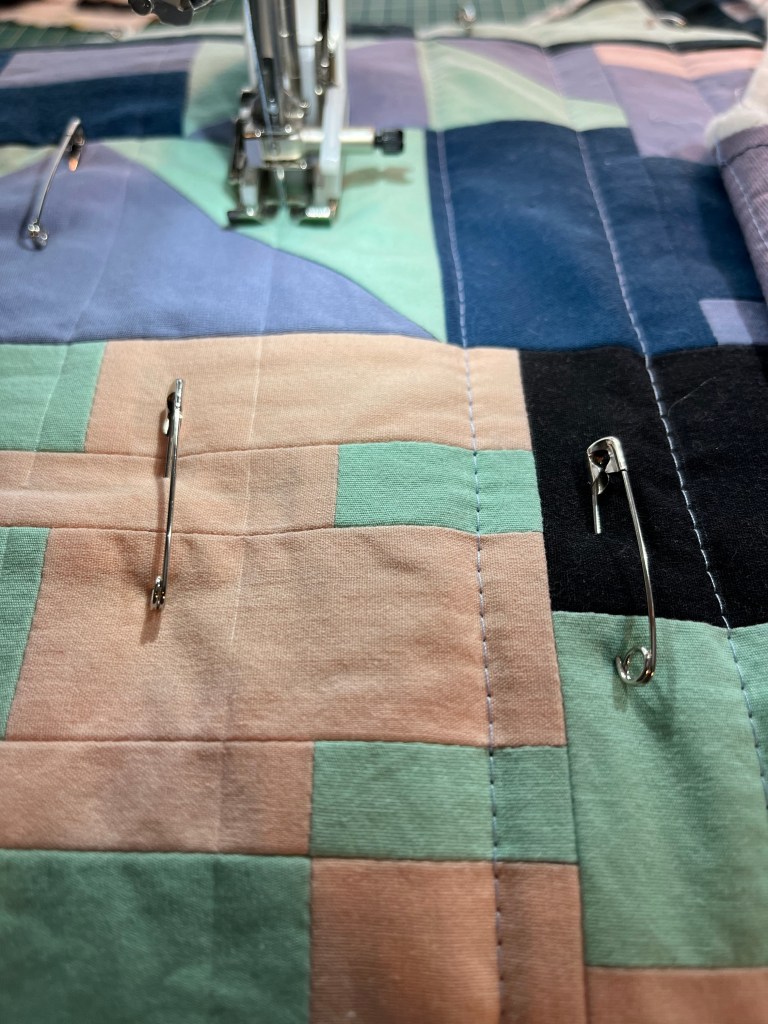
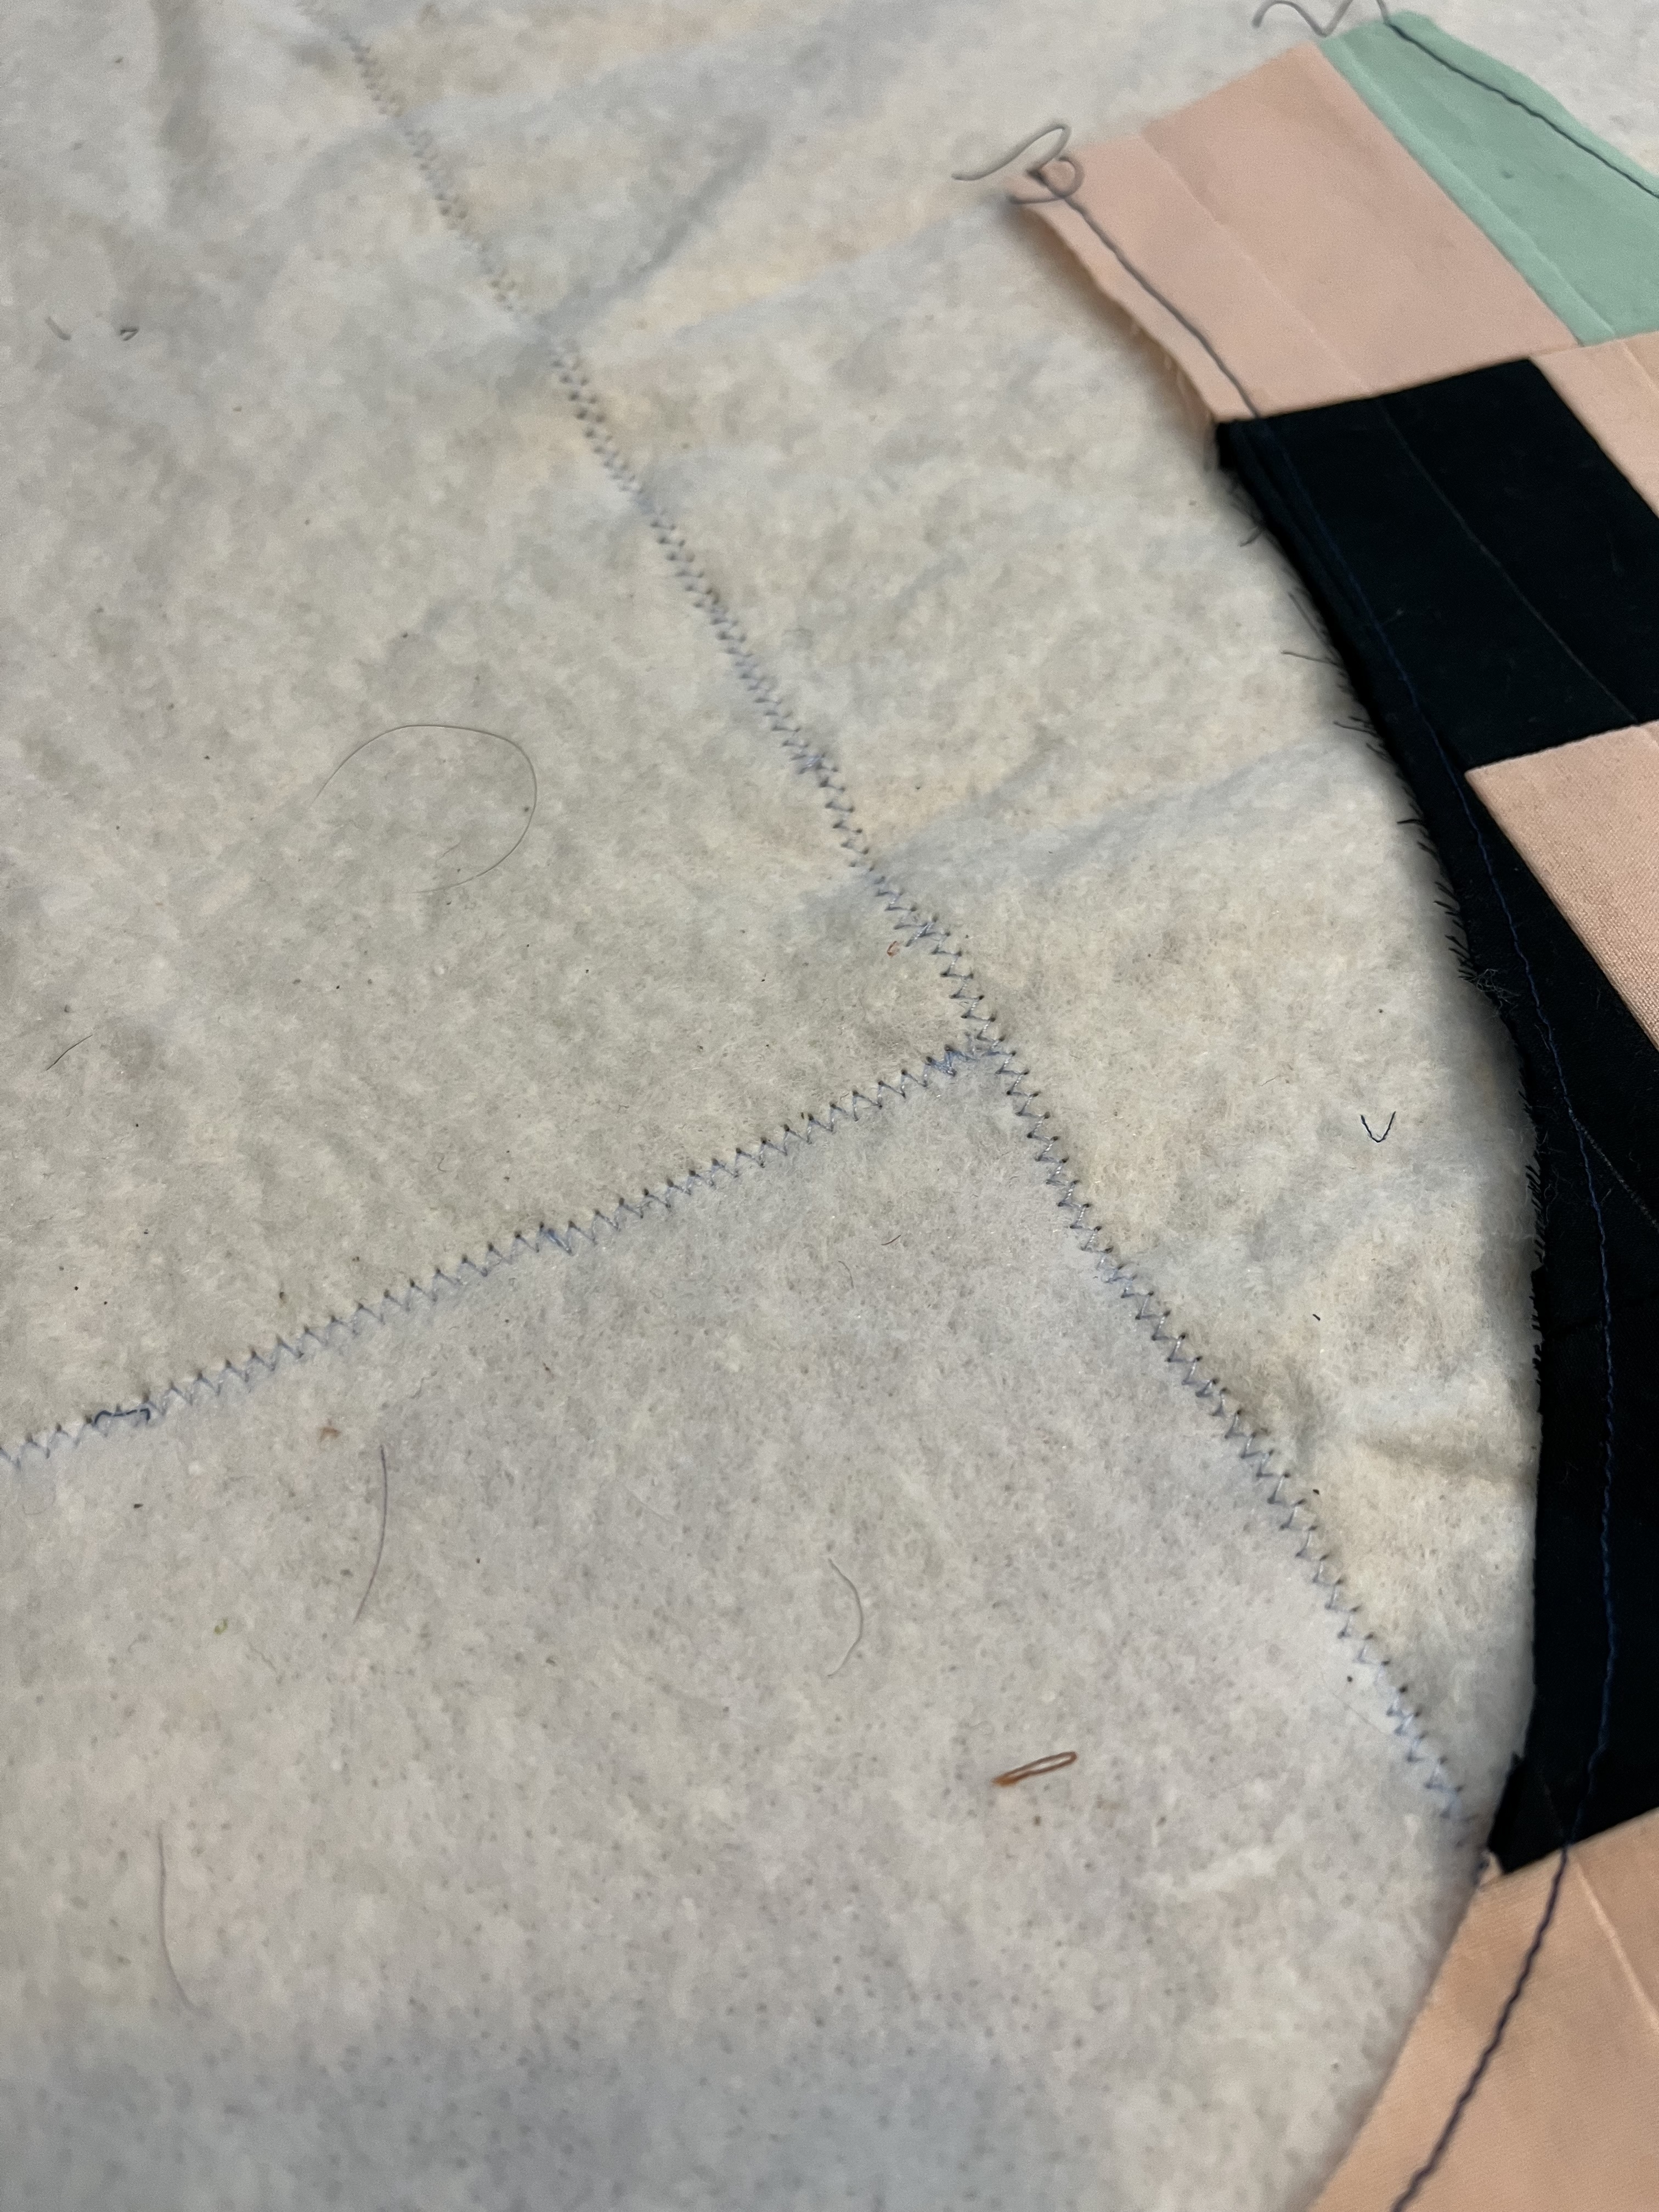
This vest was the first time (I think!) that I used a hera marker to mark my quilting lines! Syd recommends it, I already had one, so I tried it. I didn’t think I’d like using it and in the end I actually really liked it, I could actually see and follow the lines well. I did 1.25″ quilted lines that the pattern suggests. It quilts up so fast.
I am so dang lazy with changing thread color. I had this light blue Aurifil already loaded up that I was using for piecing and just went with it for the quilting. I actually never even held other thread color up to the fabrics, that’s how lazy we’re talking. I think this light blue thread is nice. I was also a little afraid I wouldn’t sew very straight so I didn’t want a thread color that was too high contrast. However, I did a great job quilting it and actually sewed my lines really straight! Like, I am VERY PROUD OF ME.
My only gripe about quilting it is I did break a needle while doing so. I kind of thought it was weird to put pins on both sides of the vest before quilting it. Next time I will take all of them out from the back side after I go crazy pinning the front. Also, it probably was a blessing in disguise? I never know when to change my needle out and well, breaking a needle will help you make that decision to put a new one in. I think I was using the same needle from quilting my last quilt (the Birch Point quilt, which I will eventually have a link to it here when I write about it). Overall–loved quilting it!!
Biased about Bias
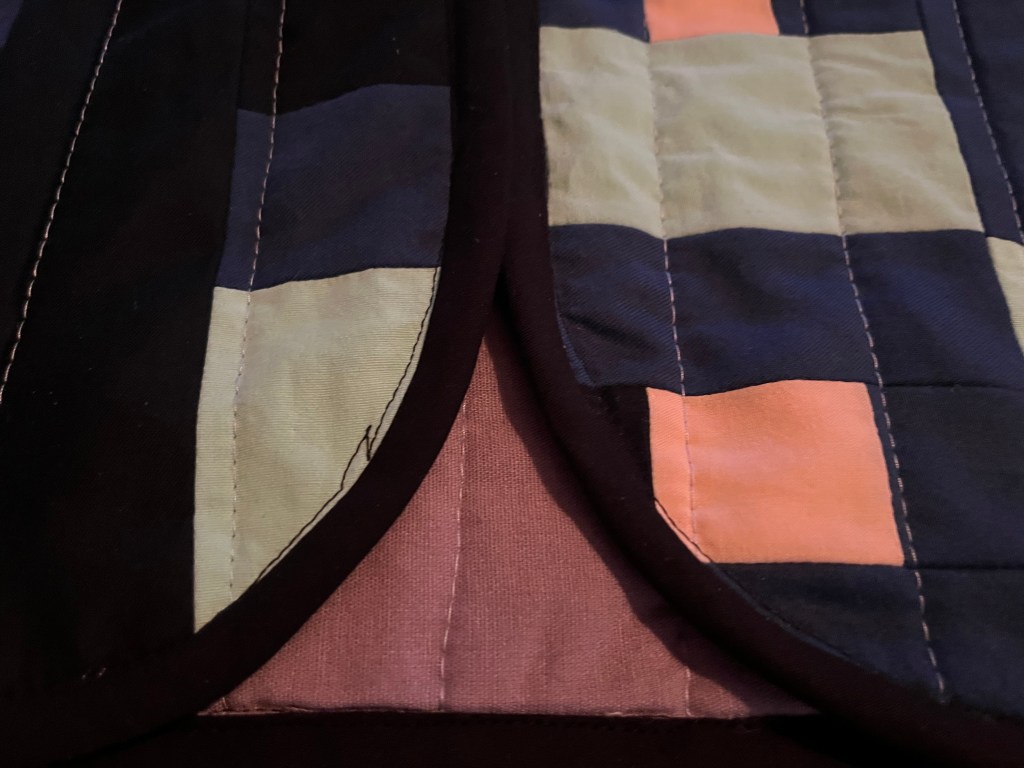
The pattern has you make continuous bias with that magic tube method. I have tried doing this before and failed. This time I DID IT, but I cut it SO badly that the edges were sooo jagged (literally what was I thinking?? I am used to rotary cutting and scissors just isn’t it for me). I tried making the bias tape work and sewed one armhole with it but it was bad, too bad to just leave it so I seam ripped it and decided to just buy black bias. I got Wright’s double fold at, ugh, Joann’s. Honestly though I do like the black for a nice contrast for the solid purple side. It was so easy to work with.

I disliked sewing the arm holes but mostly enjoyed sewing the bias around the perimeter. The curves at the bottom were a nice challenge but oops I screwed both of them up and sewed off of the bias binding. Oh well! I’m not going to fix it!
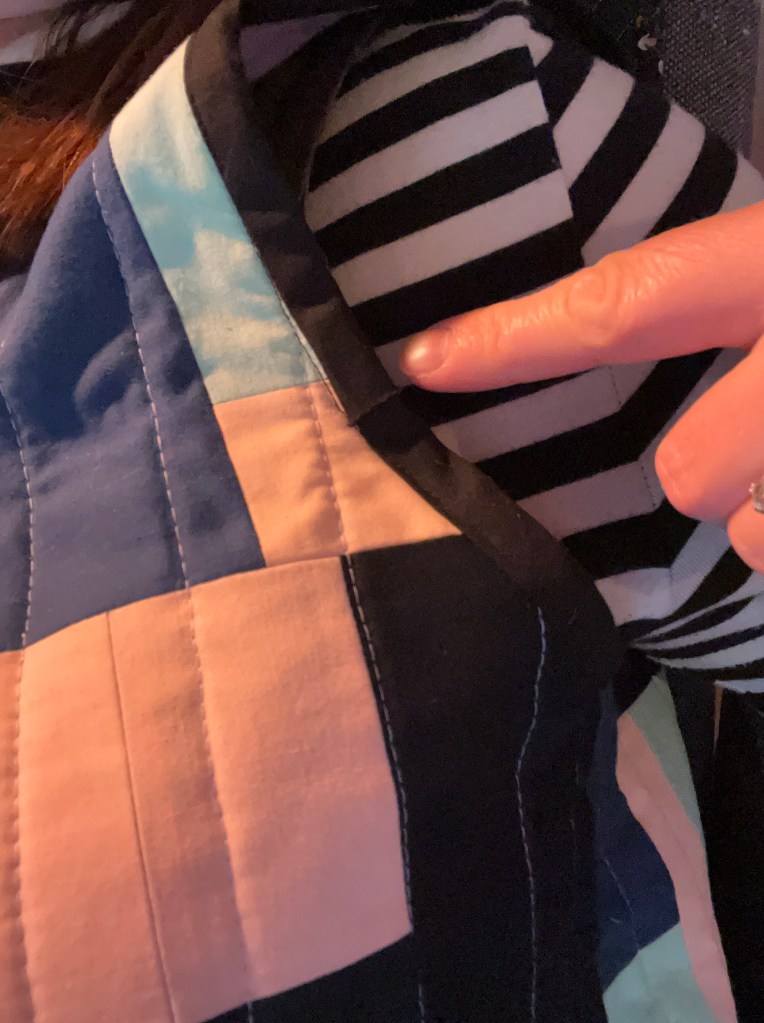
Oh and one more thing about bias–I cannot for the life of me join bias pieces. Ok I have successfully for a quilt binding but every spot on this vest where I joined bias is not very seamless. One day! For one armhole I had the bias join in the front and I do regret that, I should’ve had the bias join in a less obvious place. I don’t regret it enough though to want to seam rip and do it over haha, but it does bother me.
Written Instructions VS YouTube University
The instructions were written well, don’t get me wrong, but I almost exclusively used the YouTube tutorial sew along to make the vest. Praise be that there’s a video for this beginner. It’s one reason I love indie sewing patterns so much! So many have sew along videos or tutorials on tricky parts. They don’t have to do this but it’s such a nice perk. The length of it is perfect (30 minutes). I only have two critiques about the video–when she explains to start sewing the bias on the side of your main fabric first (she says this while she’s already sewing it, wish she had said so when she was pinning the bias on) and when she tries to explain joining the bias (the video could be clearer). Other than that, perfect tutorial. So much work goes into making a video tutorial so really, these are just a couple little nitpicky things!
Cost Breakdown & What’s Next
This vest is really a dream beginner’s project. I’ve seen two fabric shops in my city offer sewing the Ruby Vest as a class (and they are not cheap classes!!) so I guess I’m extra proud I tackled it solo with minimal mistakes. Here’s roughly what I paid for materials to make it:
Cost breakdown:
- Pattern: $16, but actually free for me with an Etsy gift card (thanks mom!!)
- Fabric: thrifted sheet (purple) $4? from Saver’s like 2 years ago so this info is lost to time
- Front fabric scraps: $2?, also thrifted and likely old sheets!
- Batting: Leftover pieces from previous quilts that I pieced together, so I’m calling this free
- Bias binding: $2.99/package, used 2 packages
So, around $12 depending how you want to slice it (if you want to include the pattern in my cost breakdown then it was about $28 to make). And I guess the price doesn’t reflect things like thread, needles, and other notions I already have and use for making, like safety pins and Wonder Clips (I need more of these though, I only have 9!).
But $12 for a wacky one-of-a kind vest? Are you kidding me? Sewing is magic.
I am going to take another look at my fabric stash and hopefully make another vest soon, probably not doing any piecing this time around so it should sew up even quicker. We’ll see how this one washes up and if it shrinks in the wash at all. I will likely go down a size or even two as I feel the size I made (12) is just a little too big, though it technically was the right size for my measurements. Better to be too big than too small though, right?
This finished project (here’s an Instagram reel of the making of it) gave me just the boost of confidence I needed to go back to another garment WIP–that Donny shirt I wrote about last fall. Yes, it’s still just sitting in a pile, all cut out. Time to face my fear and sew that puppy up! Syd has a tutorial on finishing edges without using a serger, I might just have to check that out for finishing the edges of my Donny shirt.
Thanks for reading!
Ash


2 Replies to “Sewing The Syd Graham Ruby Vest From Scraps”