I went too long without posting anything and now it’s hard to get back into that mindset! I have been doing lots of creating, I’ve just been bad at sharing. I’d also love to have finished something before I share it and I guess that’s where I’ve been stuck; I have too many WIPS (works in progress). BUT, it can be fun to share a WIP, because then you can see how things transform. Time to share a WIP!
Last weekend I went to my hometown thrift store and sorted through the fabric options. There really wasn’t much but I found a nice little bundle of solids for $2.00–can’t beat that! When I got them home I realized they were scraps from someone else’s project (dying to know what they made!) and they look mostly like they were cut up sheets. They feel like cotton but might be a blend. I got right to messing around with them.
My fabric stack! I’m bad as estimating yardage, but there should be a few yards worth of fabric here
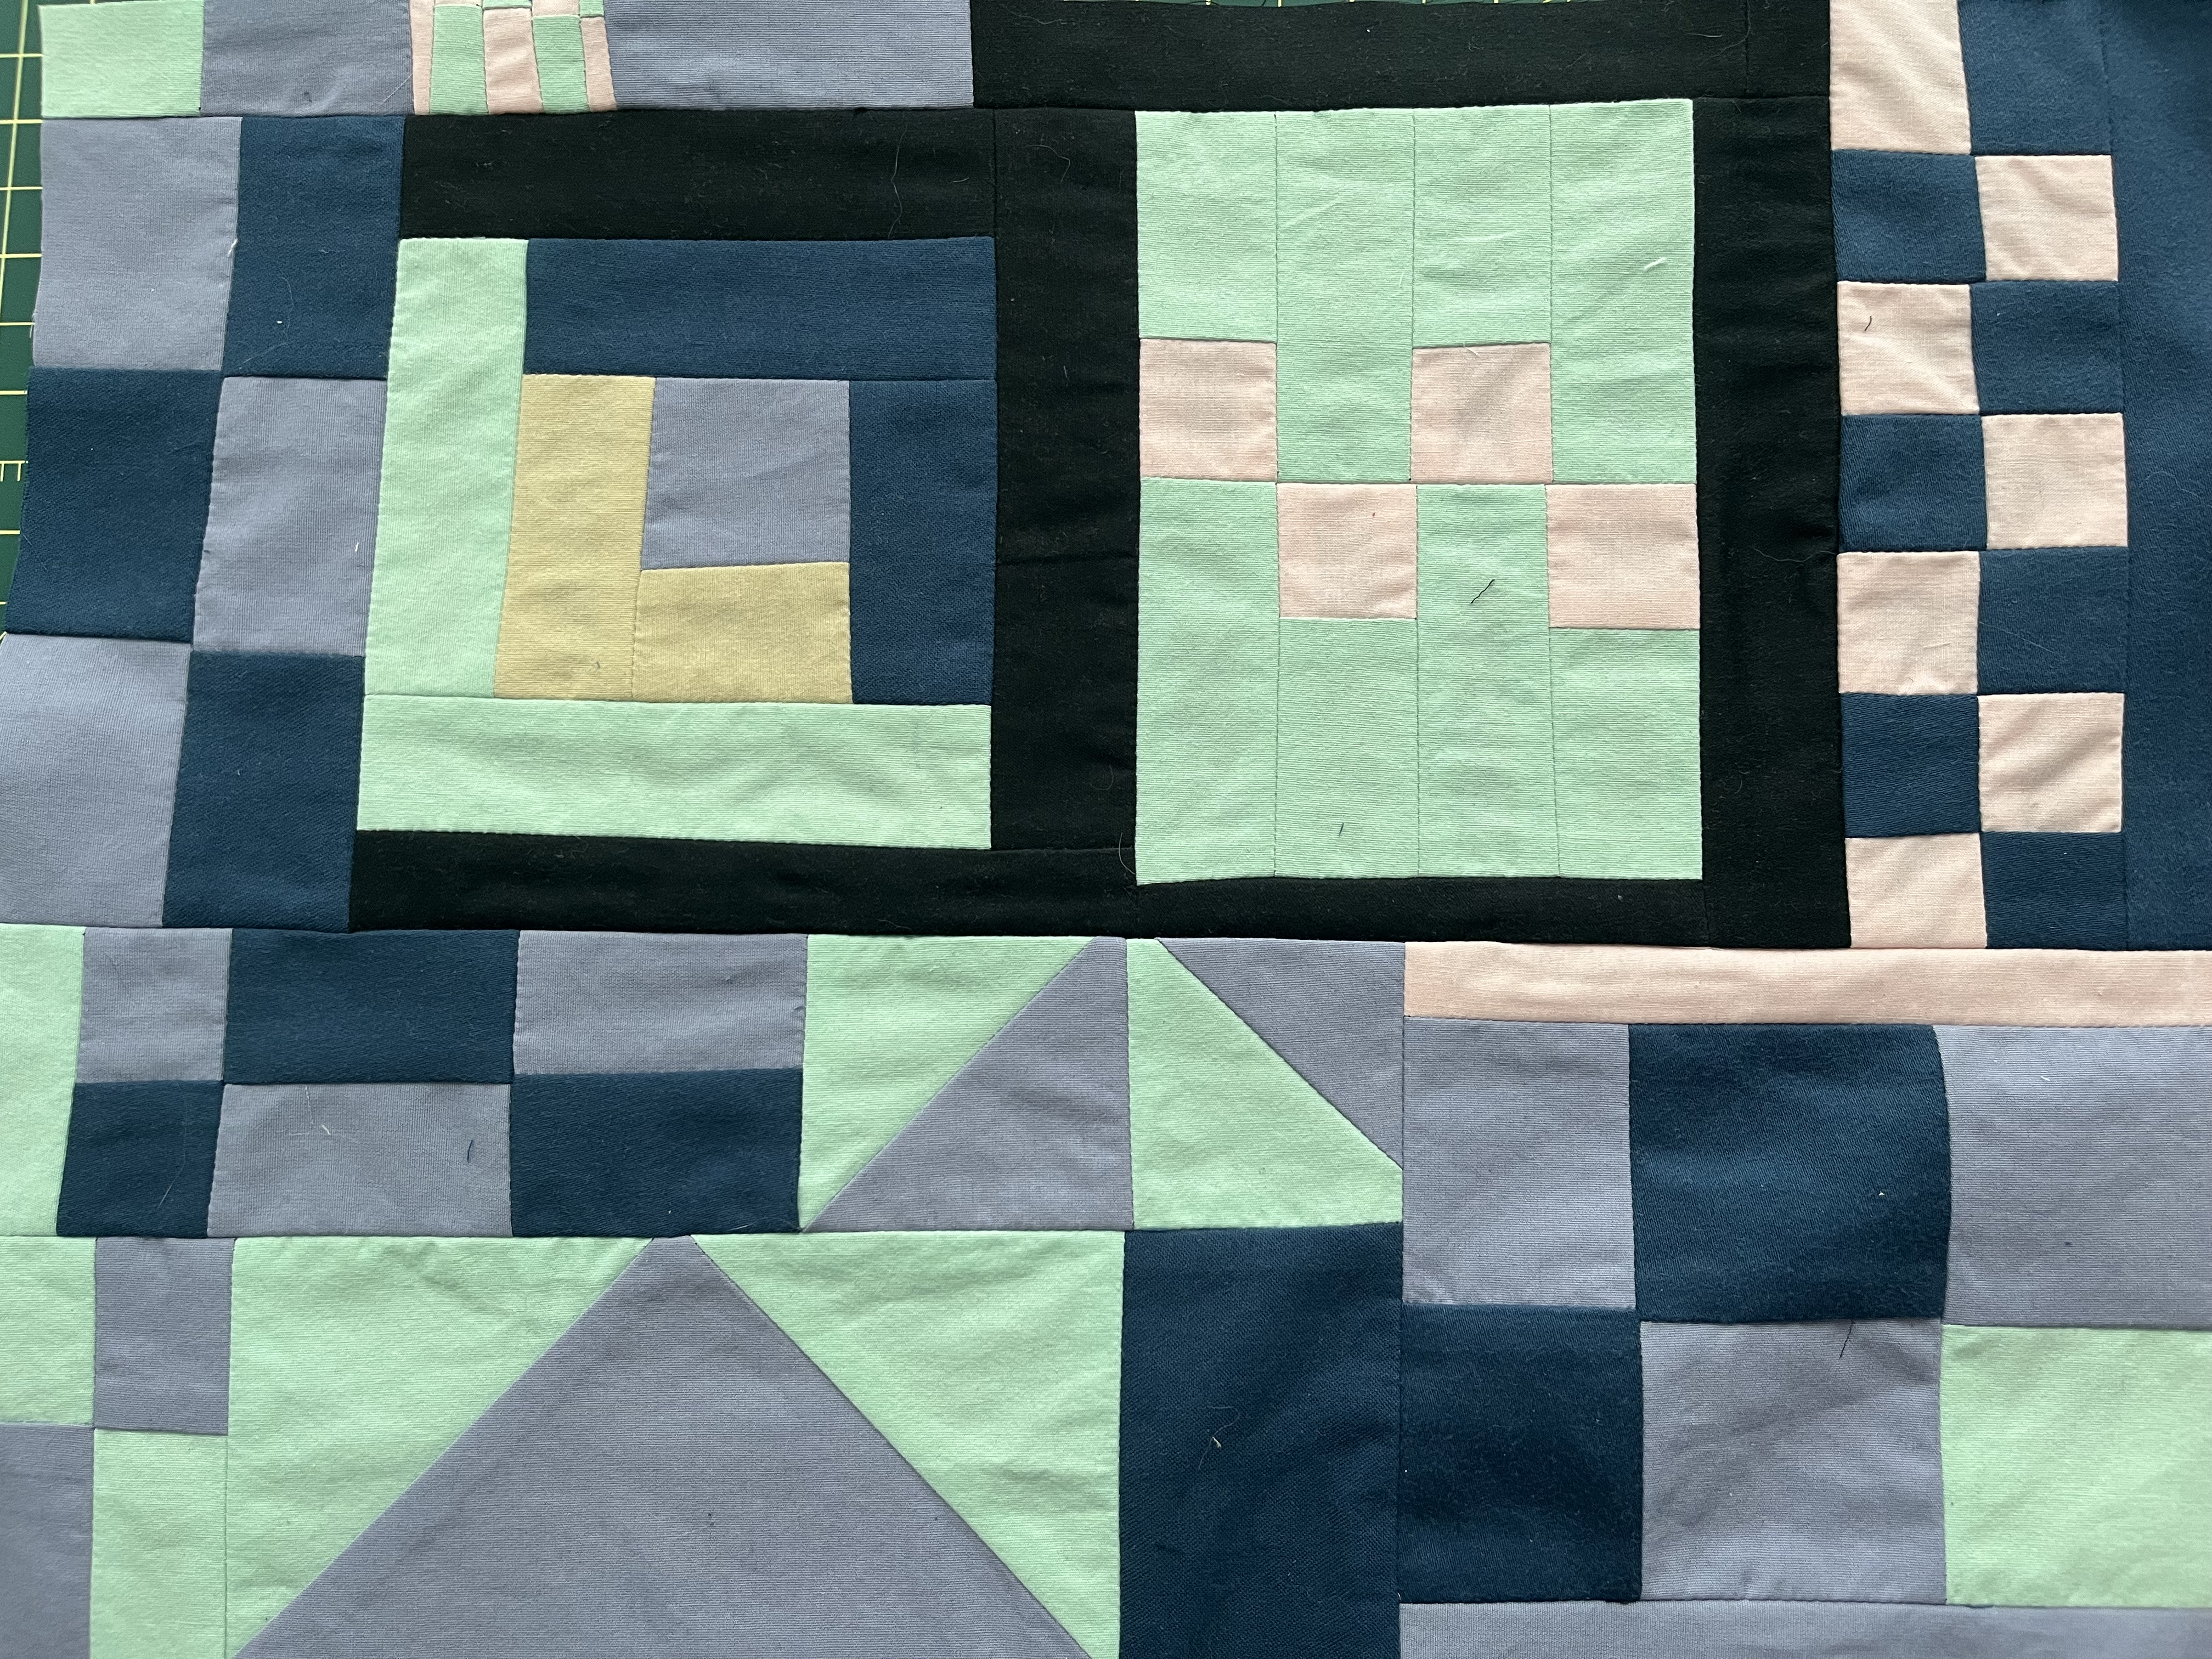
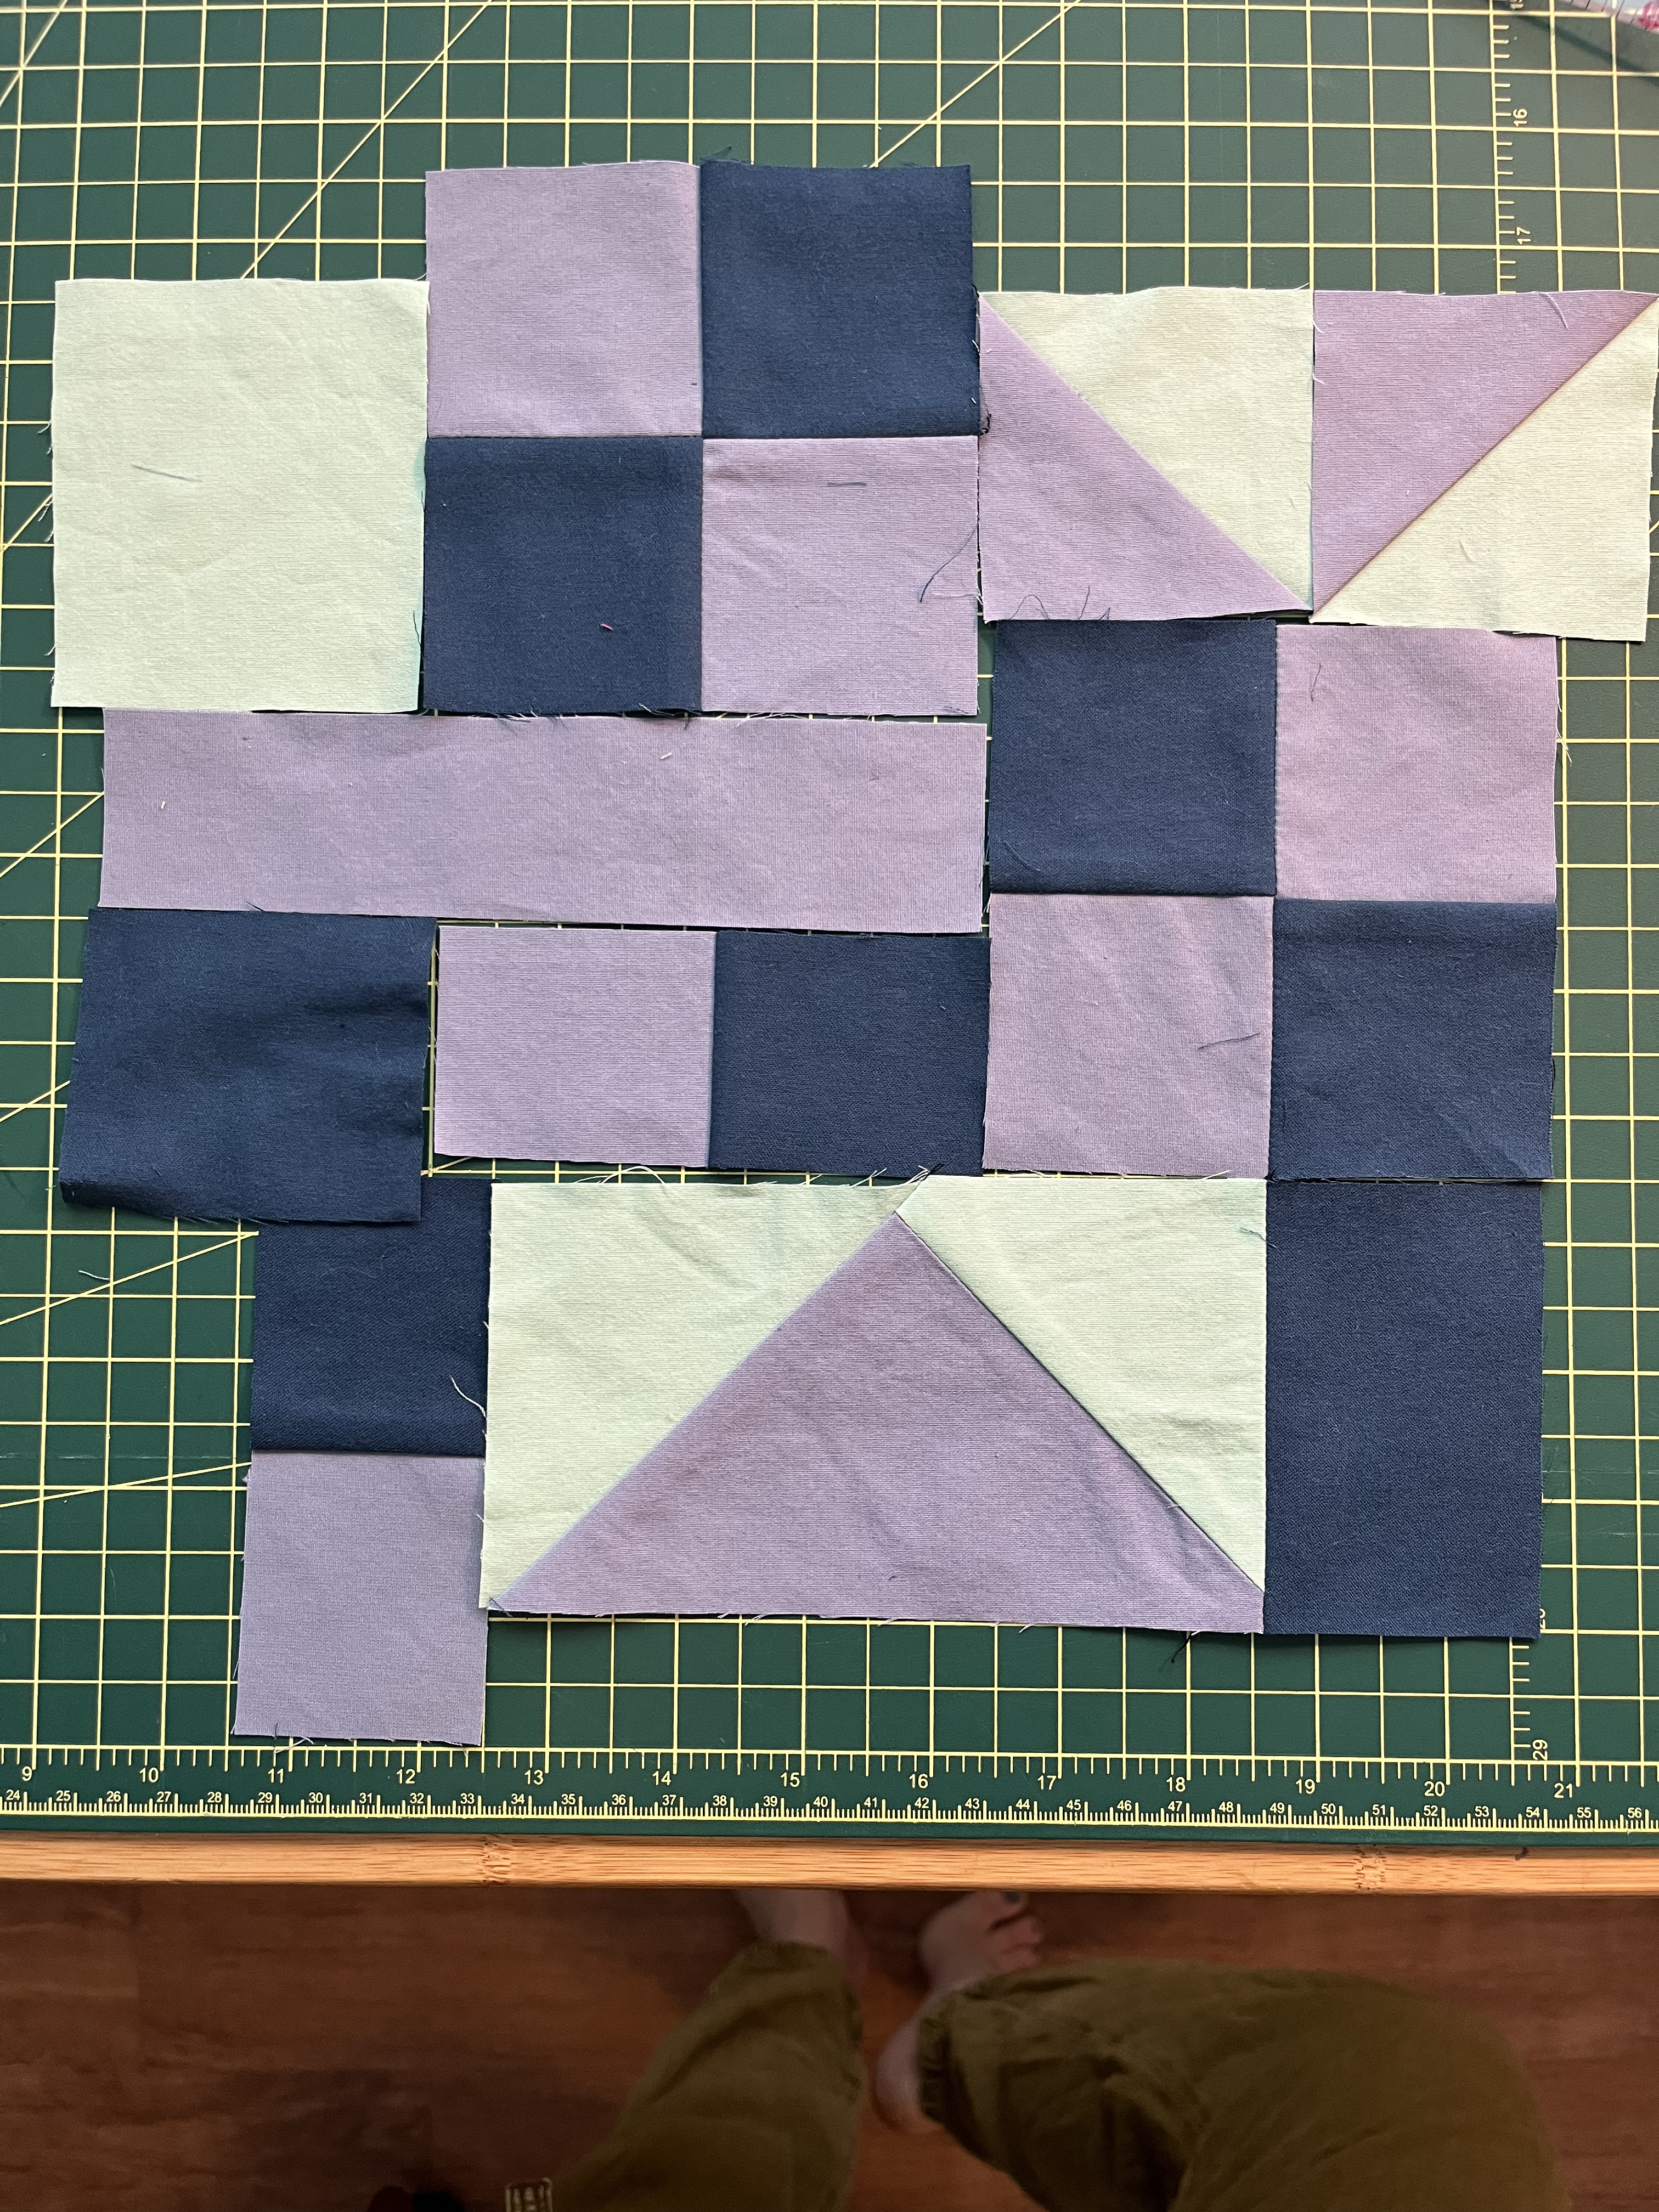
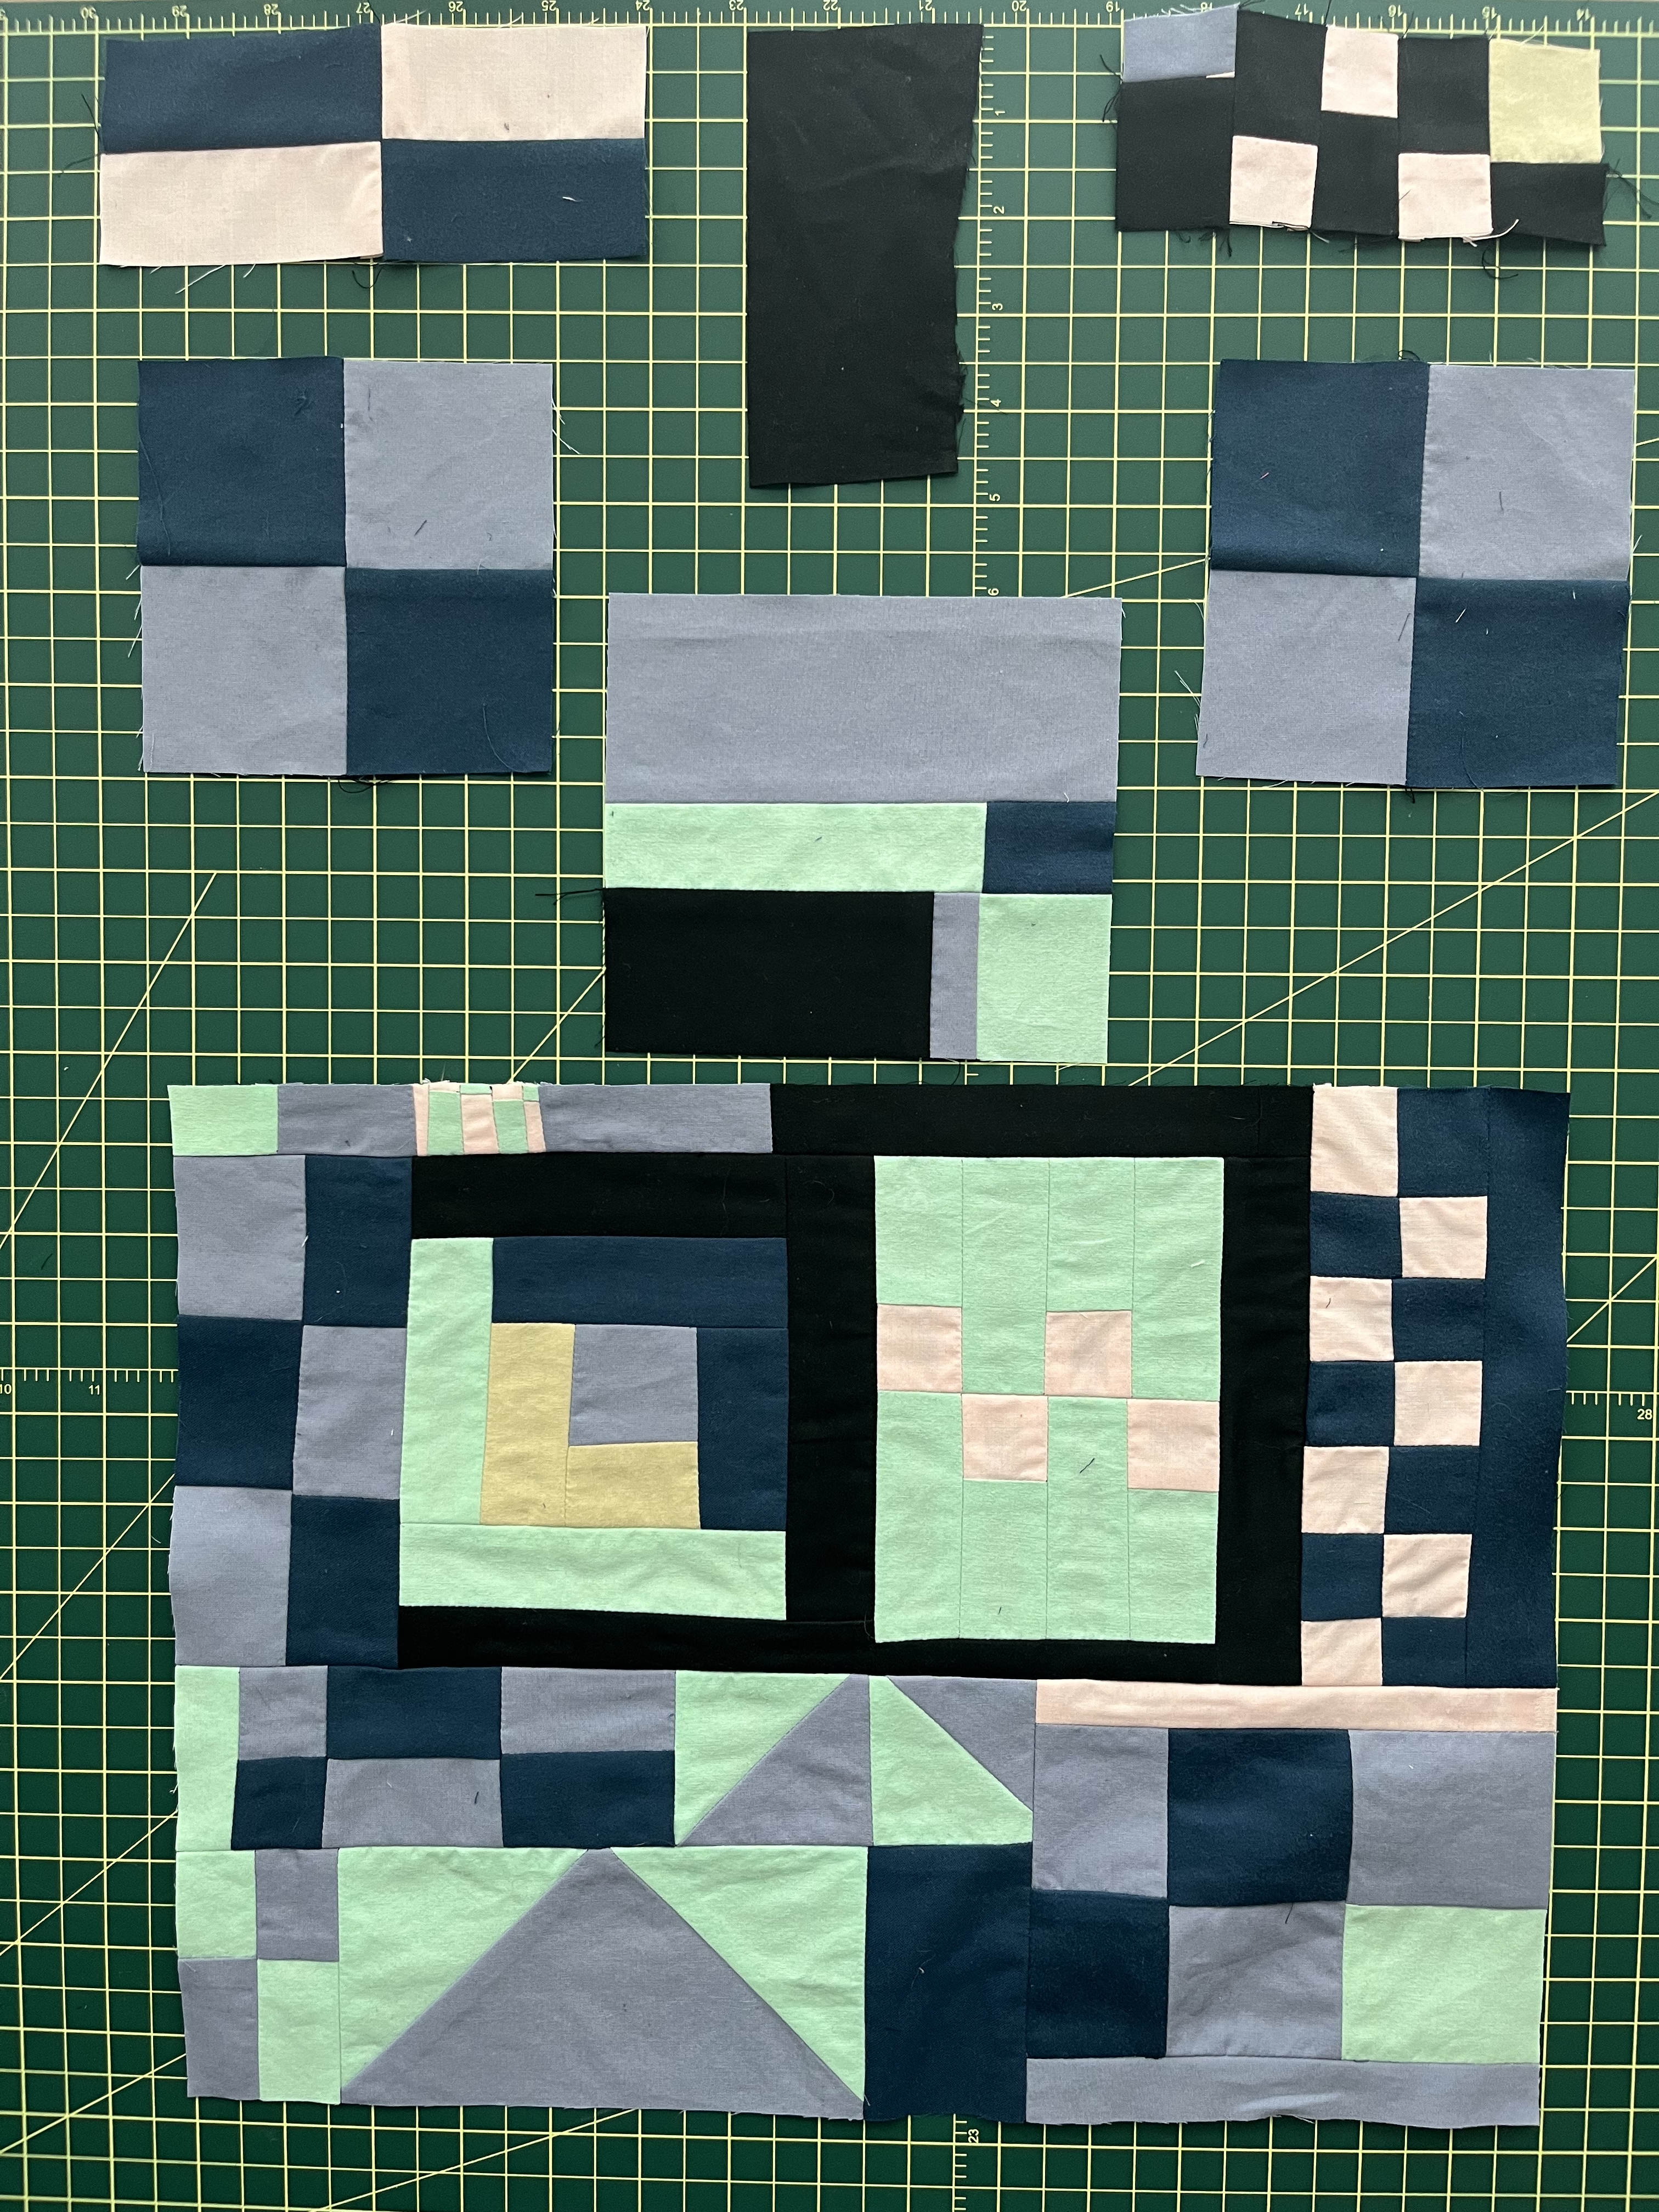
The first thing I made was a flying geese block because I’ve never made one before. Easy peasy (uh, except the point got buried in the seam oops). Then I made some four square patchwork pieces, a log cabin block (pictured further below in the post) and kept adding checkered pieces and strips here and there as I saw fit.
Flying Geese block at the bottom, in the grey-purple and green
I think I love improv quilting without a plan like this so much because that’s just it: I don’t need a plan. I can just make little pieces, add to them, cut things off as needed to make it fit. I don’t have to measure, sometimes I don’t even use a straight edge to cut! It’s so much fun and a great way to get into sewing and quilting if you’ve been wanting to start but it feels intimidating to you. It’s also just such low stakes if you’re using cheap fabric scraps because who cares if you make a mistake? I also love to collage and playing with fabric in this way reminds me of that. However, it’s disappointingly slow sometimes. I often sit and analyze too long about what should go where, how can I balance things, but for the most part I get into a good flow and have fun.
Pining two blocks together before sewing. I love how messy the backs look!
I’m surprised how much I like these colors together too. I probably wouldn’t have picked out the beige and the green but here I think they work well with the other colors. I especially love the green with the pink and the green with the greyish-purple.
Crazy how lighting makes a difference in the colors; here I photographed the pieces with natural daylight
I’m not sure what I’m going to turn this piece into (Edit: I turned it into a vest in January 2025! Read about it here). I usually, automatically think I need to go big(ger) and make a throw quilt but there’s so much satisfaction too in working small and getting something done. I don’t have any quilted wallhangings or pillows, so maybe that’s where this is going. Stay tuned.
Satisfyingly wonky. I love the tiniest sliver of pink peeking out!
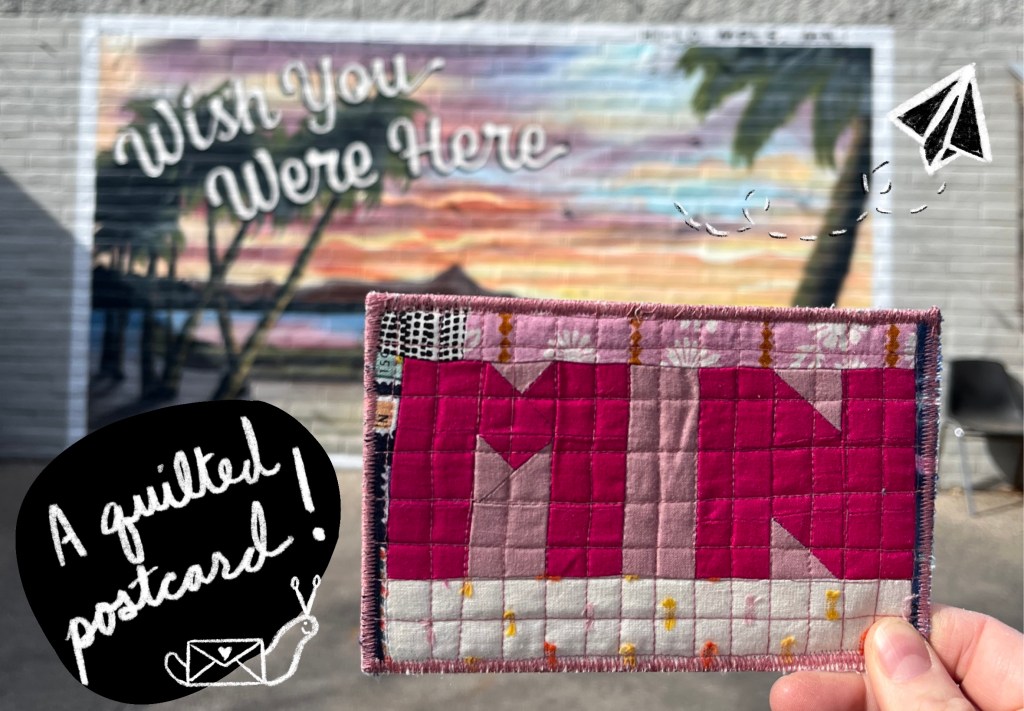
It’s March and I finally finished a quilt, but it’s probably not what you imagine when I say quilt. Thanks to a swap challenge my quilt guild is doing with the Albuquerque Modern Quilt Guild I got a kick in the pants to make a quilt and have a deadline to finish it by (I am finding having a deadline, for me, was key to actually following all the way through on a project).
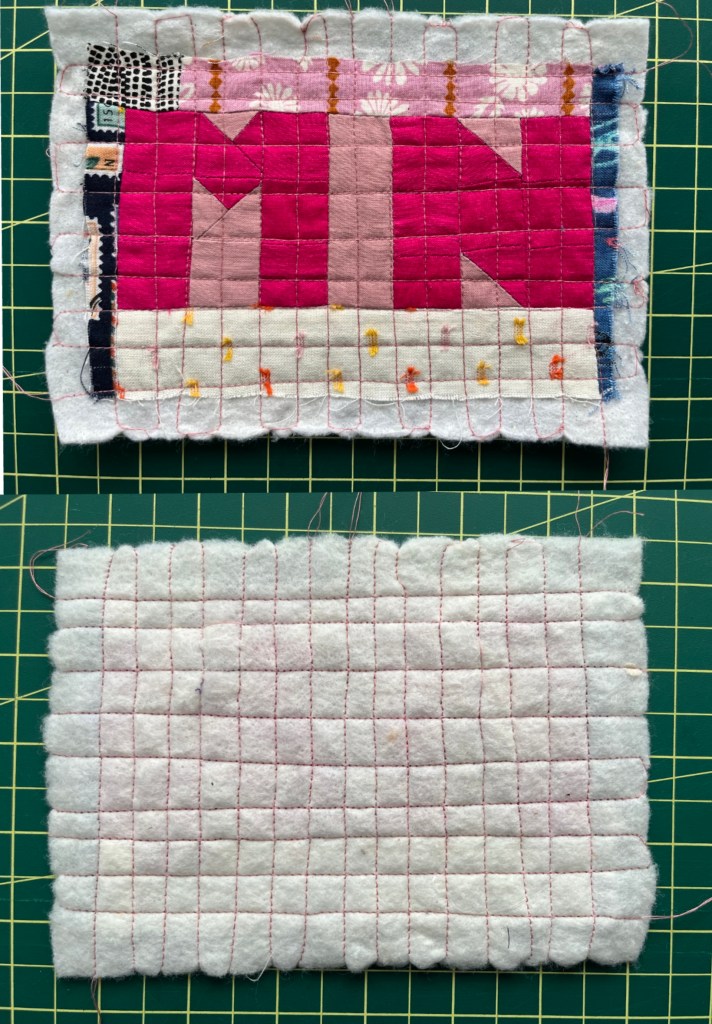
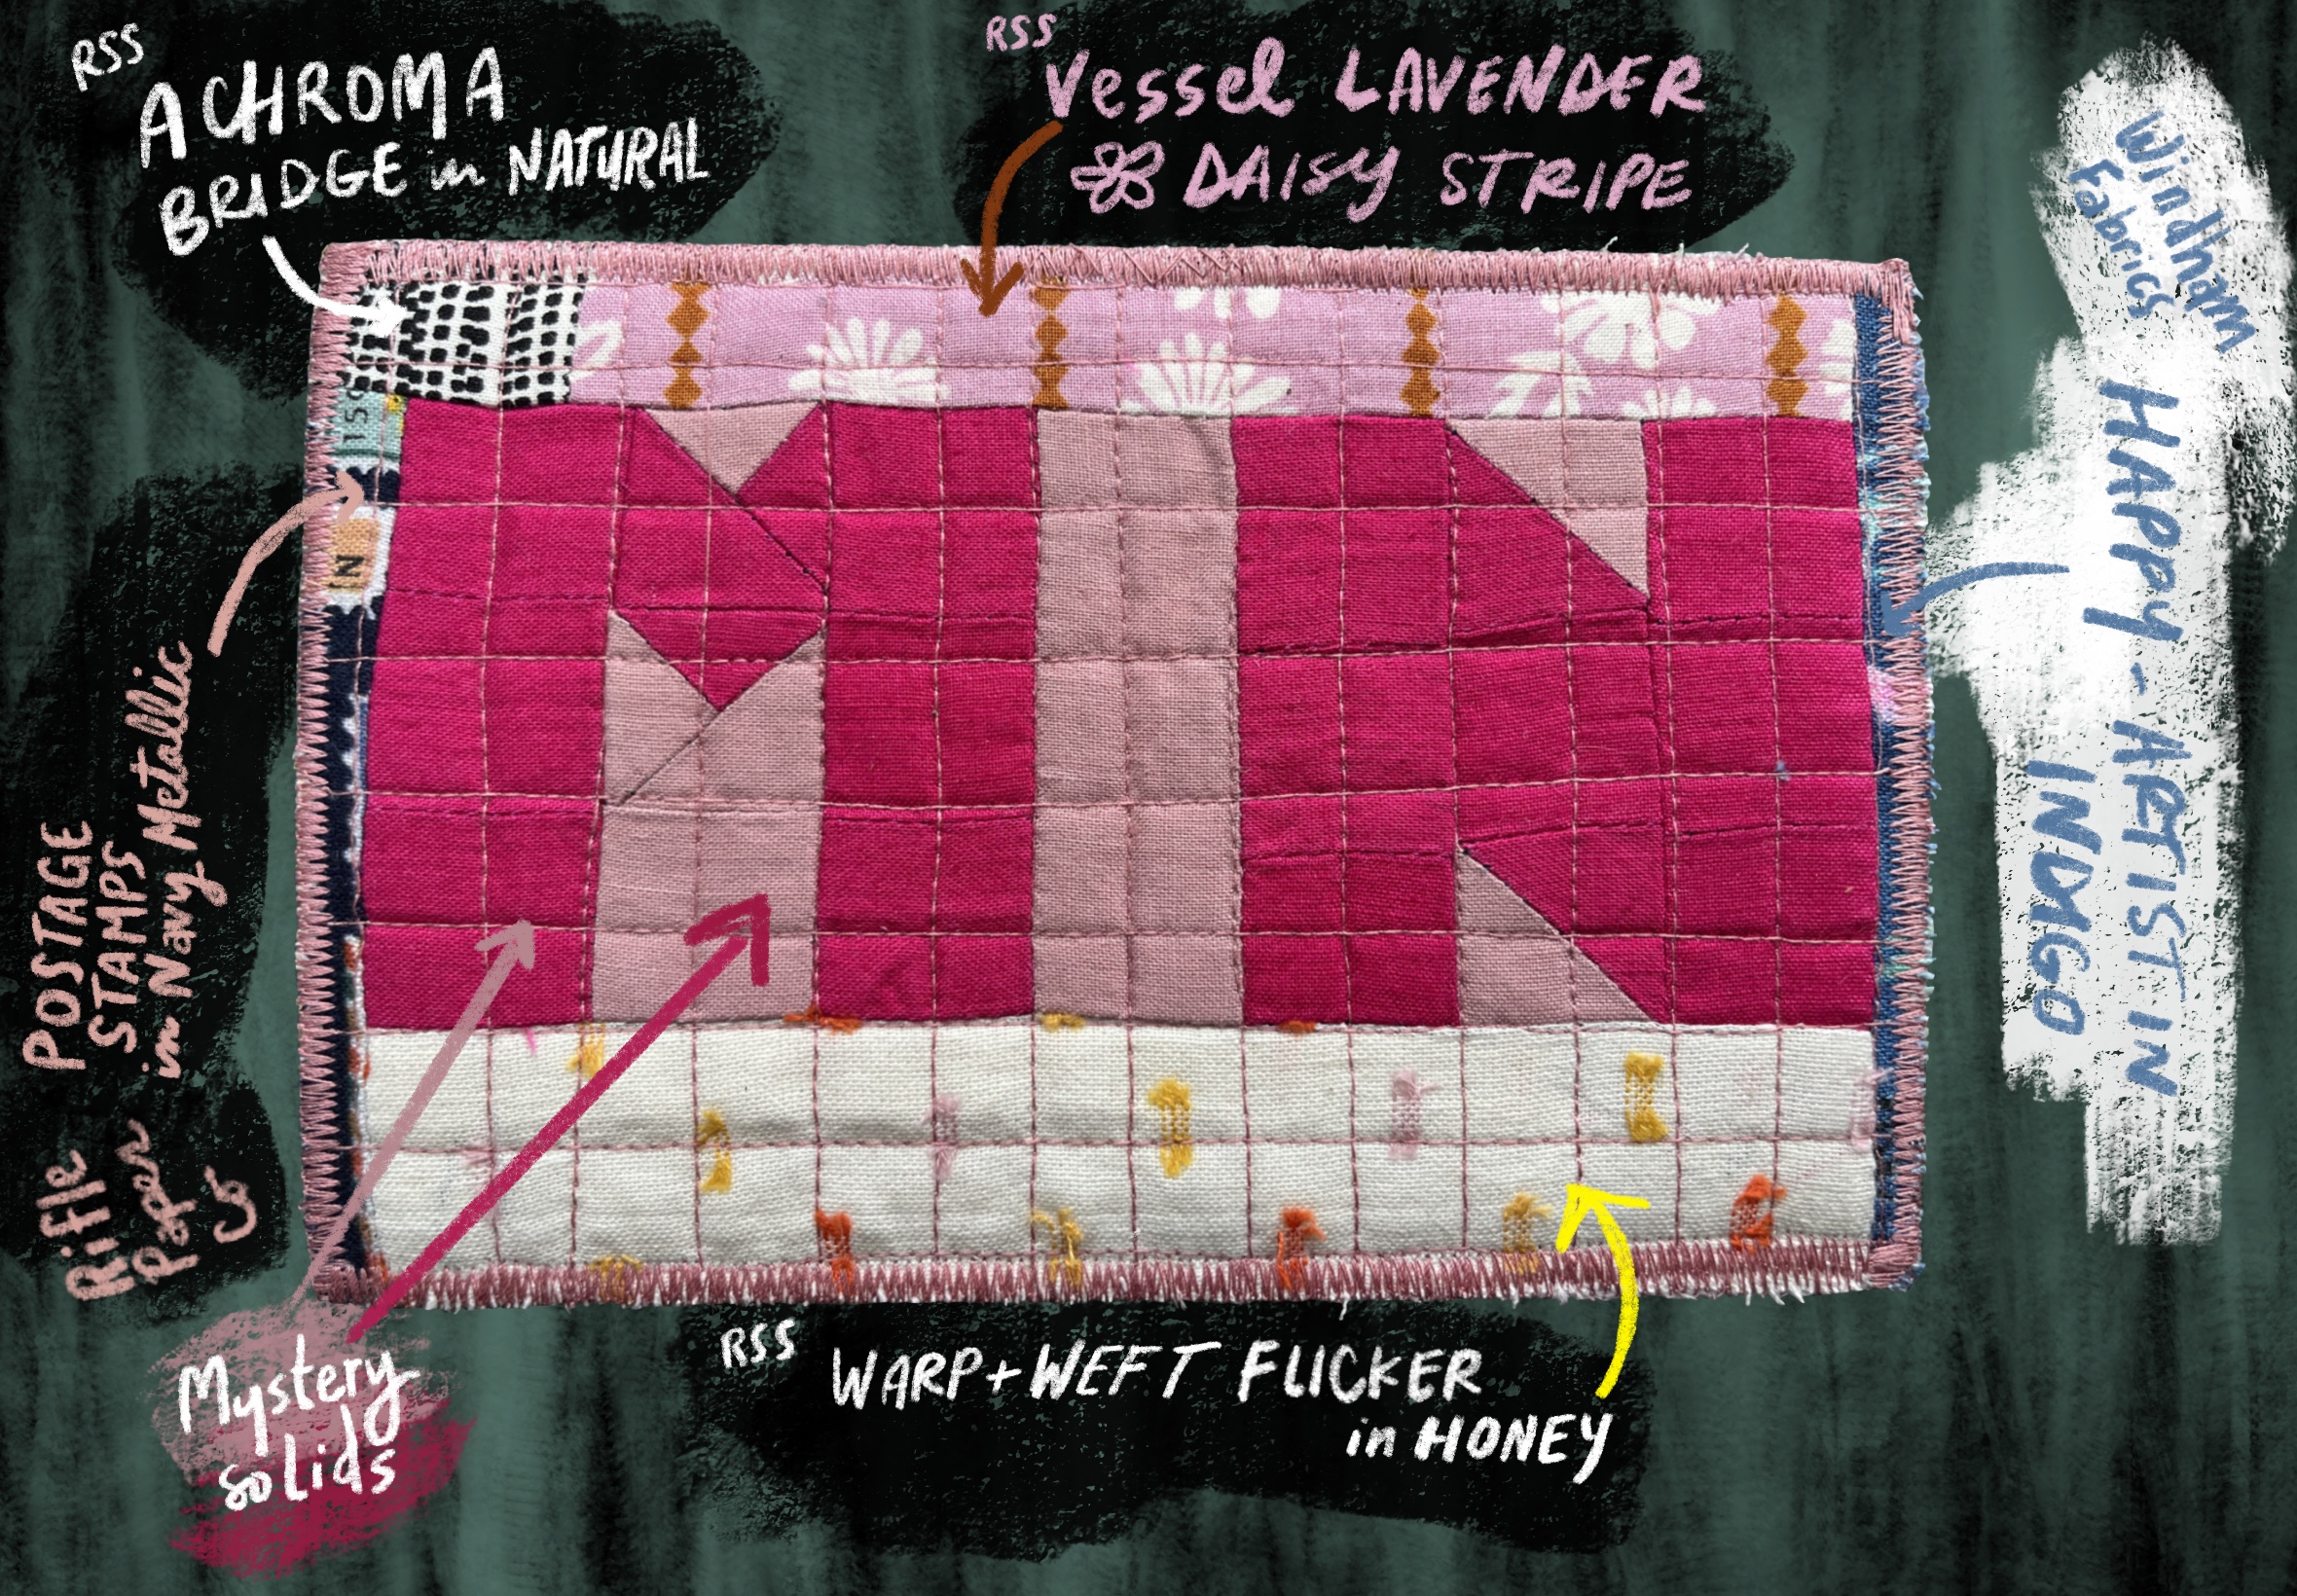
The quilt in question is actually a quilted postcard so yes, my first finished quilt of the year measures 6 inches by 4 inches! I flippin’ LOVE mail and get so much joy out of sending mail so I couldn’t not sign up for this one. I don’t care that it’s a wee quilt, it counts as a finished quilt–I pieced the top, quilted the top layer to the batting, put some fusible interfacing between that layer and card stock, and zigzag stitched around the perimeter twice to get all the layers together. The quilting is a little wobbly and the perimeter zigzag stitching is uneven and sparse in spots (it’s charming that way) but even with those flaws I think it turned out pretty cute and I’m quite proud of the finished piece. It’s handmade! It’s fun! My guild provided a bunch of links to help with this make and the one I solely relied on was Sarah Ruiz’s quilted postcard tutorial which is available as a free PDF download. Her guide is great!
A finished quilted postcard in front of a postcard mural
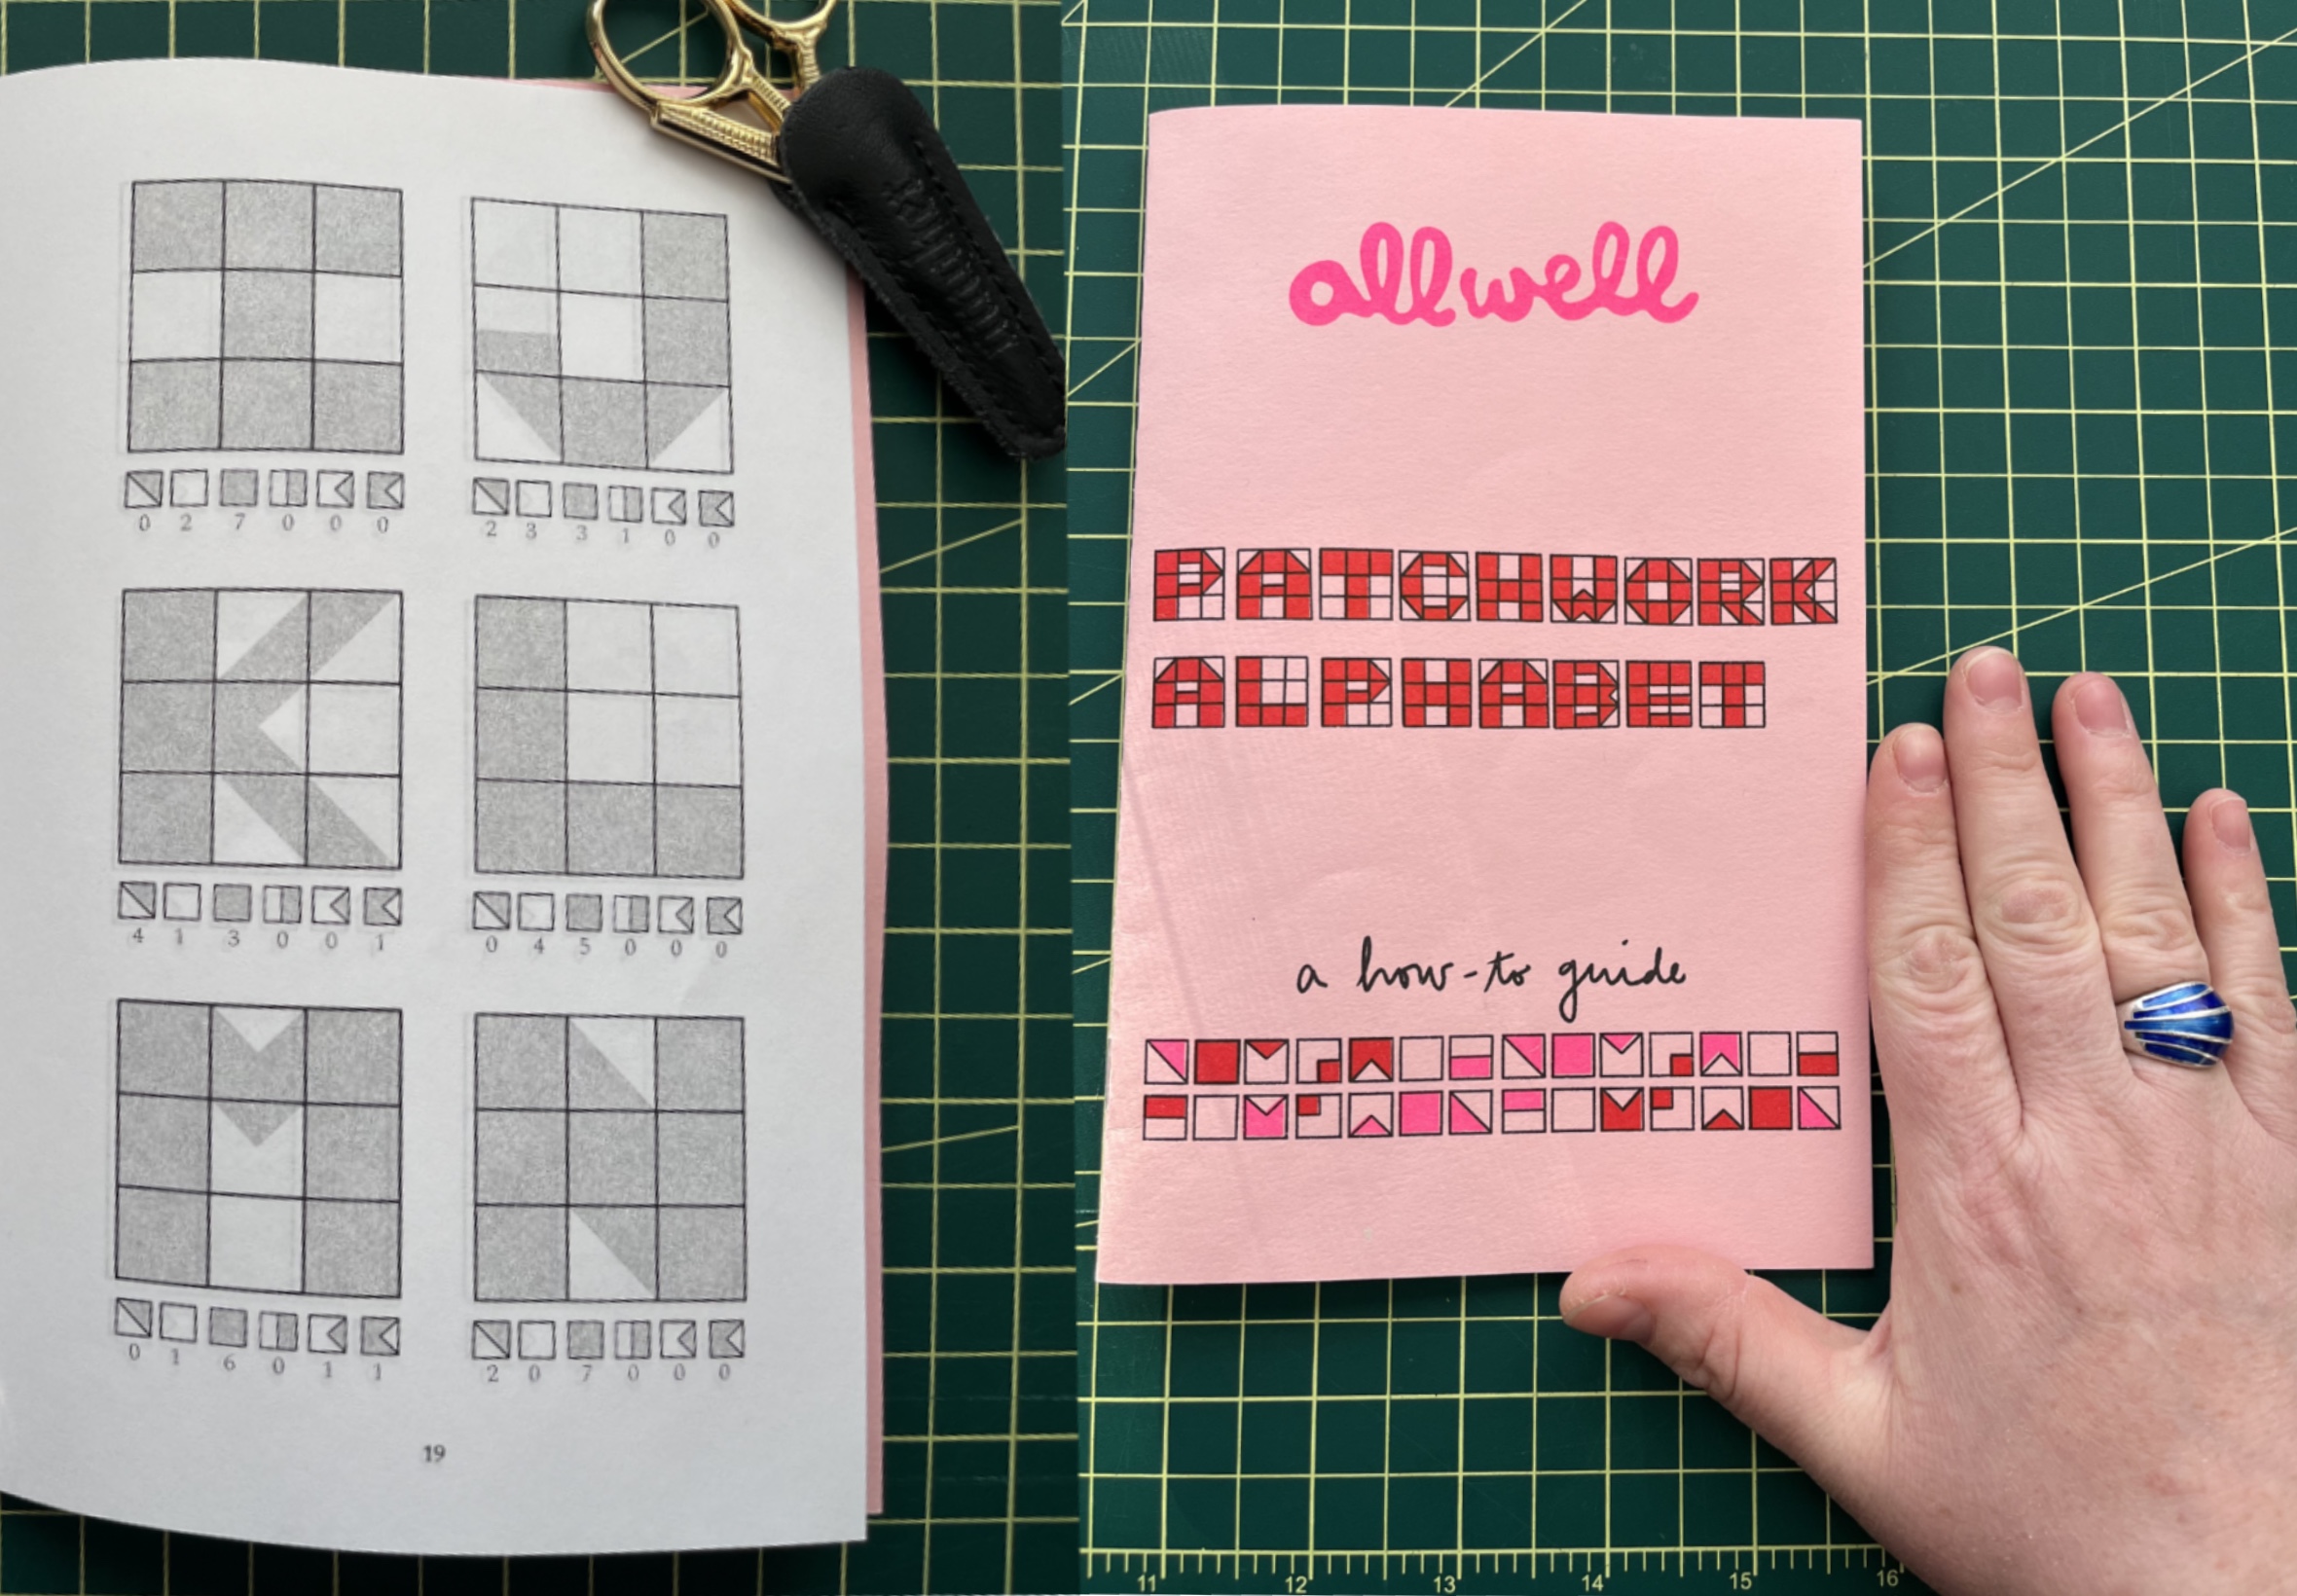
Since I’m mailing the postcard from Minnesota and postcards typically have some sort of indication that you’re receiving it from someone not where you are I wanted to put my state’s initials on there. To make the pieced letters I used the instructions found in All Well’s Patchwork Alphabet how-to guide zine. I also love that I’m mailing it to New Mexico–MN to NM!
A page open to the letters I needed to make and the cutie zine
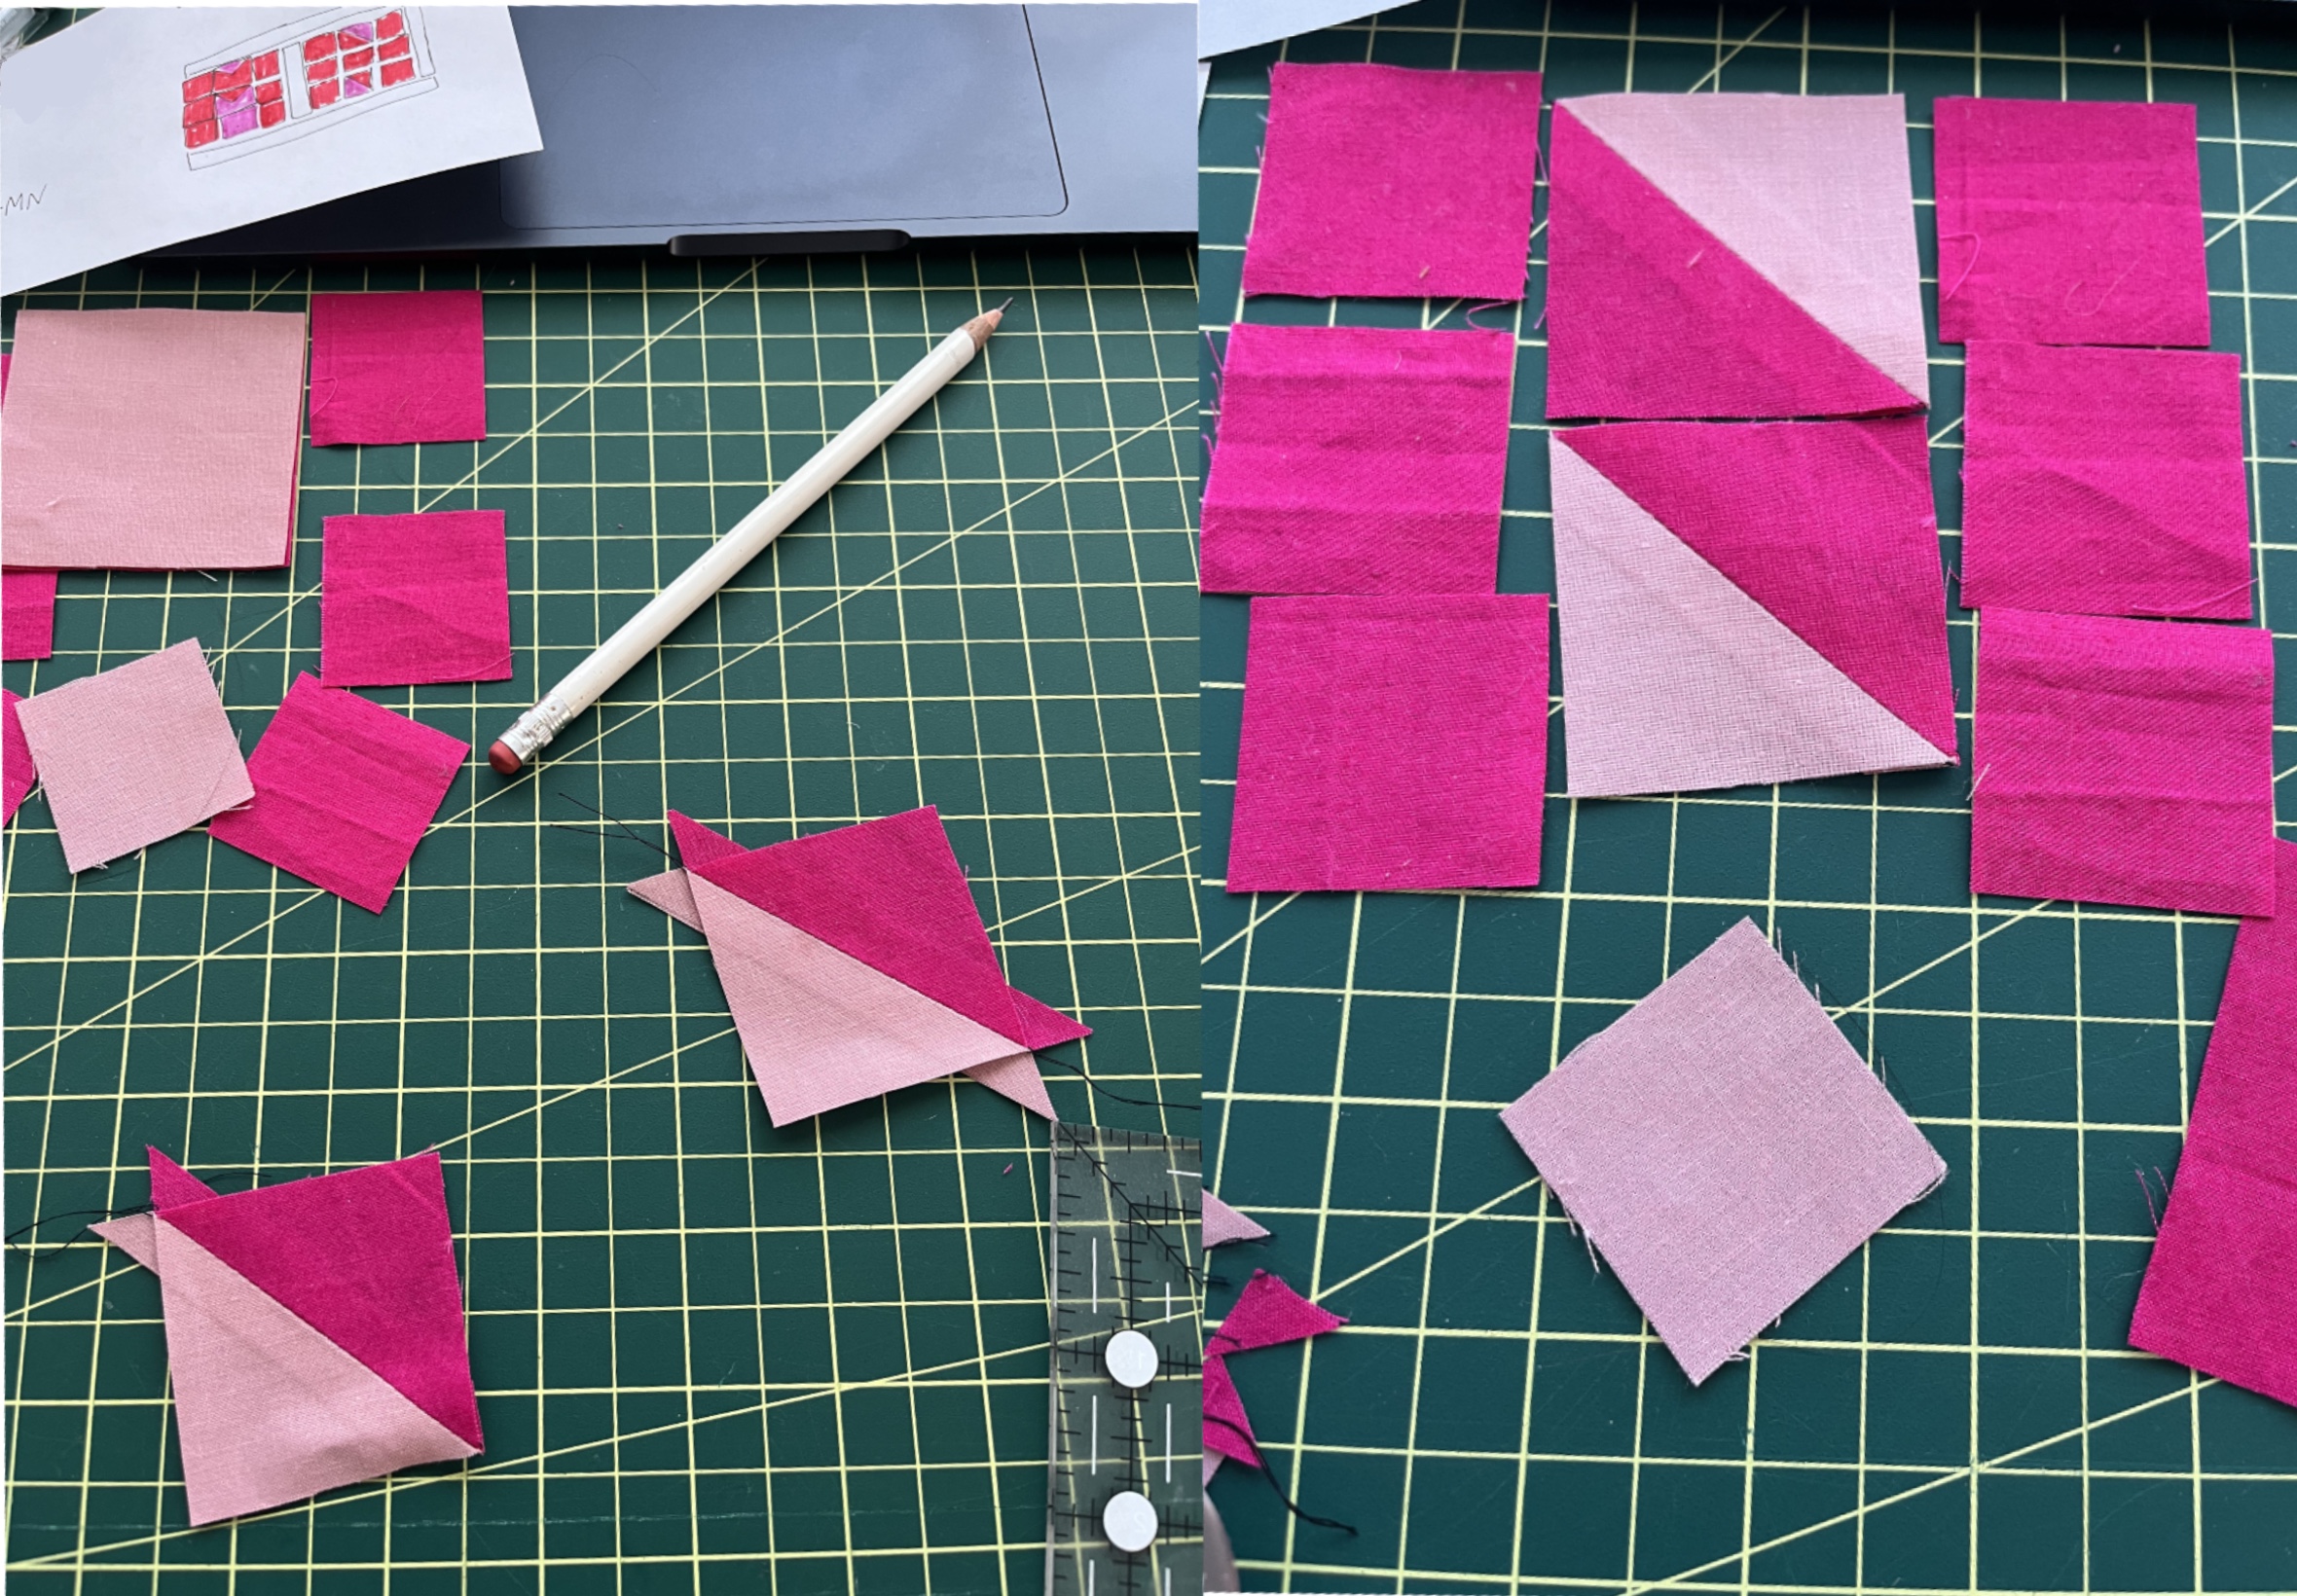
Piecing the patchwork letters
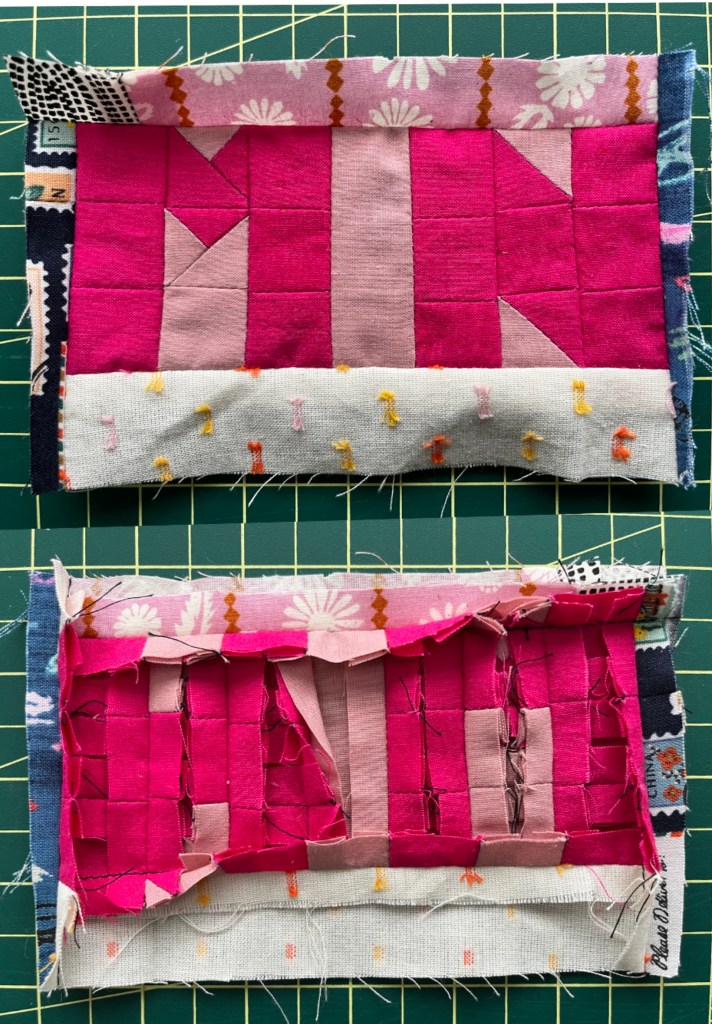
This was my first time using interfacing in any sewing project and it was kind of a fail? I only bought it because the instructions recommended it to provide stiffness/stability to the postcard. I used Pellon 808 Craft-Fuse and got it to fuse to the card stock but not to the batting. I maybe didn’t have the interfacing facing the right way; it states to put the shiny side of the interfacing against the wrong side of the fabric, which I thought I did but maybe I actually did not. If you have any other ideas about what went wrong comment below or write me please.
I also only had instructions on how to use this interfacing in Spanish, which begs the question, ¿por qué? Porque the English instructions were a casualty when the interfacing was cut for me at the fabric shop, that’s all. I did use Google translate to make sure I was reading it correctly since we live in the future (my Spanish has gotten SO BAD but I give myself a solid B and a pat on the back for my translation efforts before I resorted to Google). After ironing and ironing I didn’t want to dink around with it any more. The fact that it fused to one layer was good enough for me. Maybe it’s supposed to only fuse to one side!
Front and back (woof, that back) before quiltingFront and back after quilting
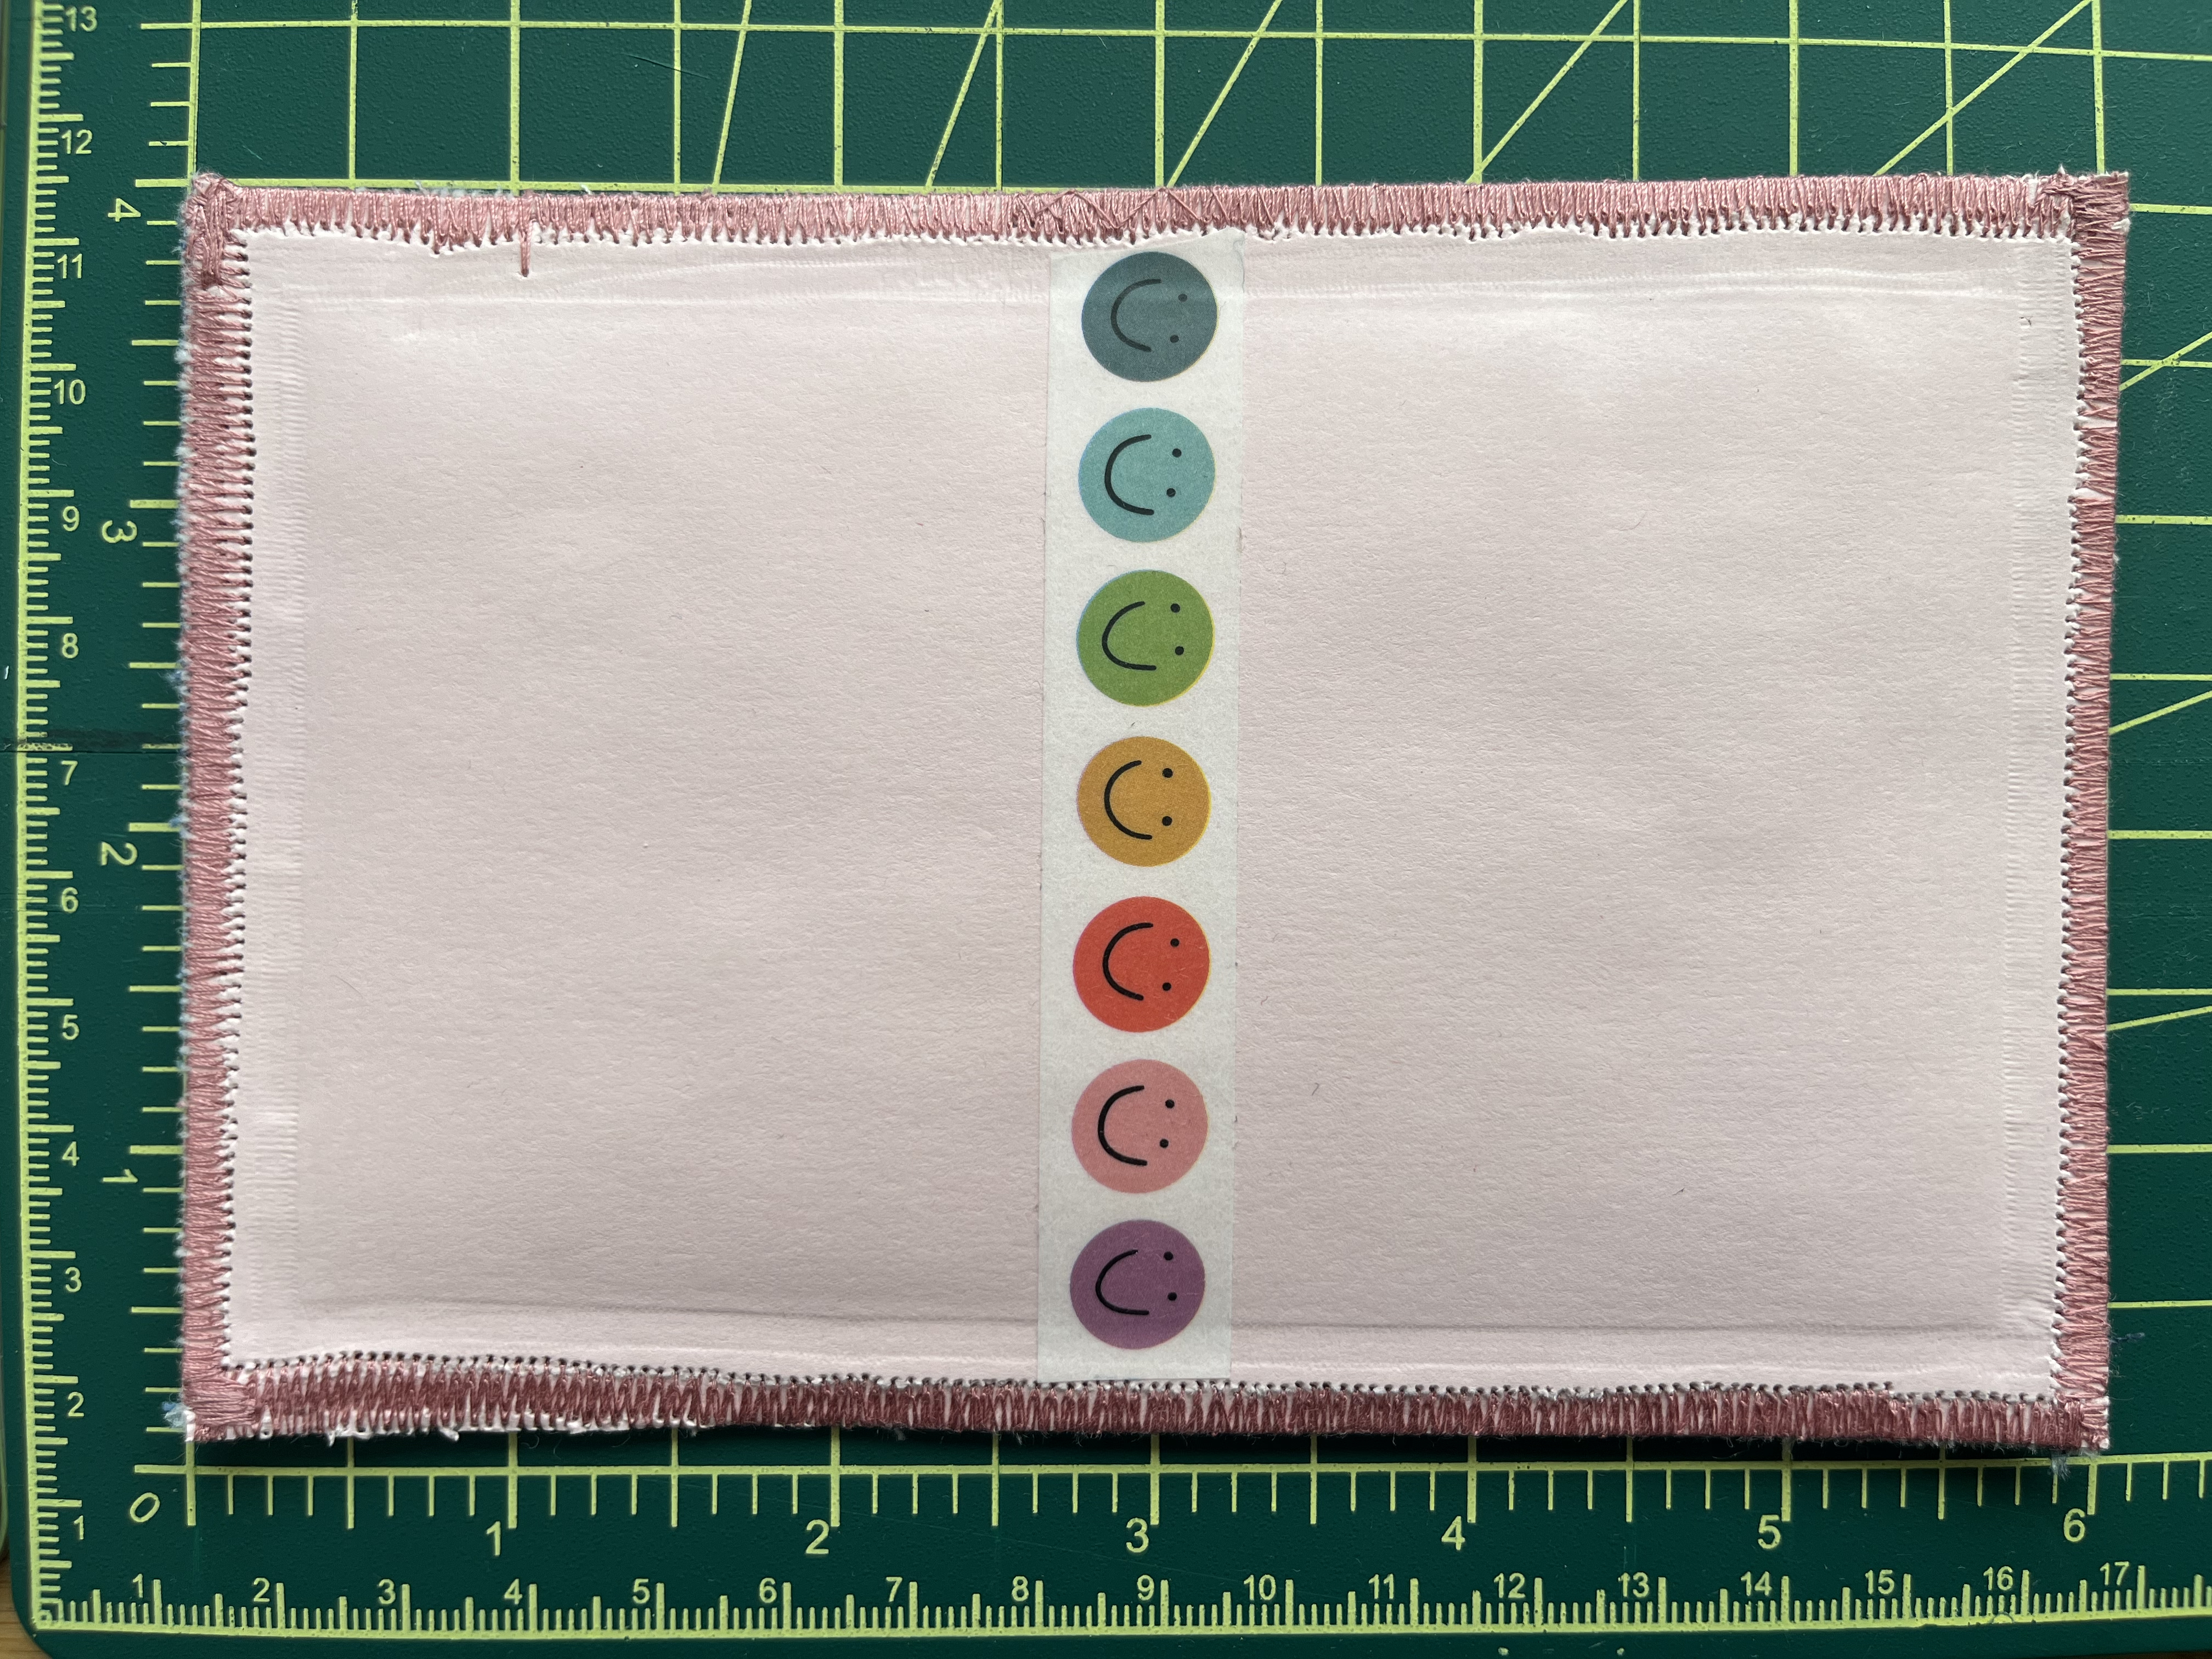
The entire postcard is made up of scrap cotton quilting fabric from my stash. I think I got the solids from my neighborhood Buy Nothing group and the others are mostly Ruby Star Society, all little scraps I pulled out of a pile on my desk; they’re all being used in another quilt I plan on writing more on soon! I used a 50wt Victorian Rose Aurifil cotton thread for the quilting and 50wt black Guttermann cotton thread for the piecing. The batting must’ve been a cotton but beyond that I’m not sure what brand I used. I didn’t quite intend for the postage stamps fabric and the happy artist fabric to be so teeny tiny. If I were piecing this again I’d make the spacing between the letters smaller so that the outside fabric would show more.
Fabrics used. RSS = Ruby Star Society
The finished postcard back with a swipe of smiley washi tape down the middle
Oh, and I almost forgot–this was my first time using my new quilting walking foot! It was a good project to try it out on. I can’t believe I waited so long to get one. For years I (wrongly) assumed I couldn’t get one for my sweet 1960’s vintage Singer but one quick Google search revealed that I indeed could get a walking foot and it wasn’t expensive at all. It was a dream to use! Never again will I struggle to shove a quilt sandwich over my feed dogs! Here’s my walking foot. Now I’m wondering if I need to order some of the other fancy quilting feet.
We’ll see if this postcard makes it safely to Albuquerque. I decided to go to the post office to double check a postcard stamp was sufficient (it was) and mail it as-is. I didn’t get any pushback from the perfectly nice postal employee I interacted with, thankfully. Some in my guild have said some postal workers they encountered have been quite cantankerous or even downright mean about their quilted postcards saying that the machines wouldn’t be able to handle it (as an aside: does the post office turn people into misanthropes or are misanthropes naturally more attracted to the profession?). No matter what I for sure want to make more because having a quick, easy to finish project is very motivating. Anyone need some snail mail?
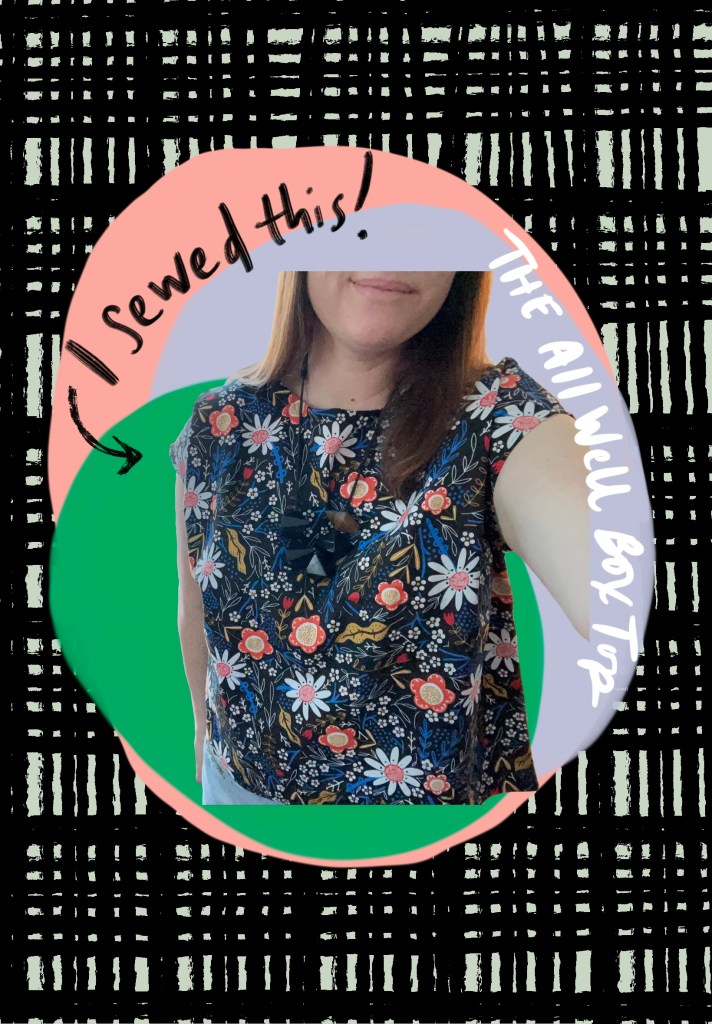
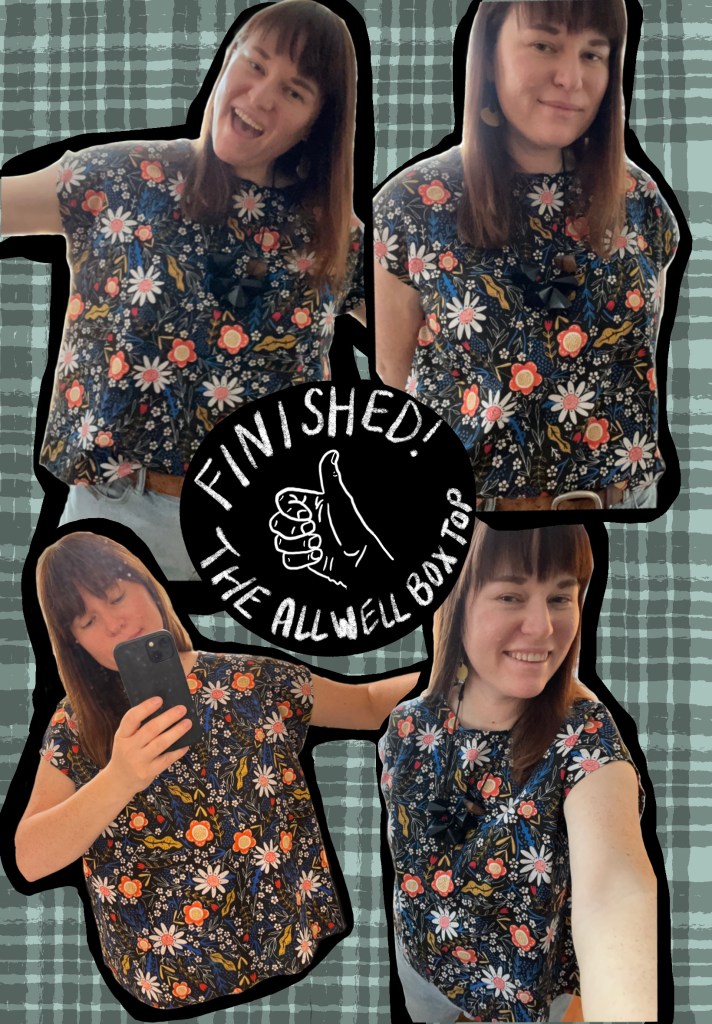
TL;DR: I made my first garment and it took me a long time but that’s ok because I’m still learning. I don’t like the fabric I chose but I do like the pattern and will make it again after giving more thought to the fabric.
Pattern: The All Well Box Top from the book How to Sew Clothes by Amy Bornman and Amelia Greenhall
Notions Used: .25 in wide black double fold bias binding by Wrights, 50 wt black cotton thread by Guttermann
Size: 3, no modifications
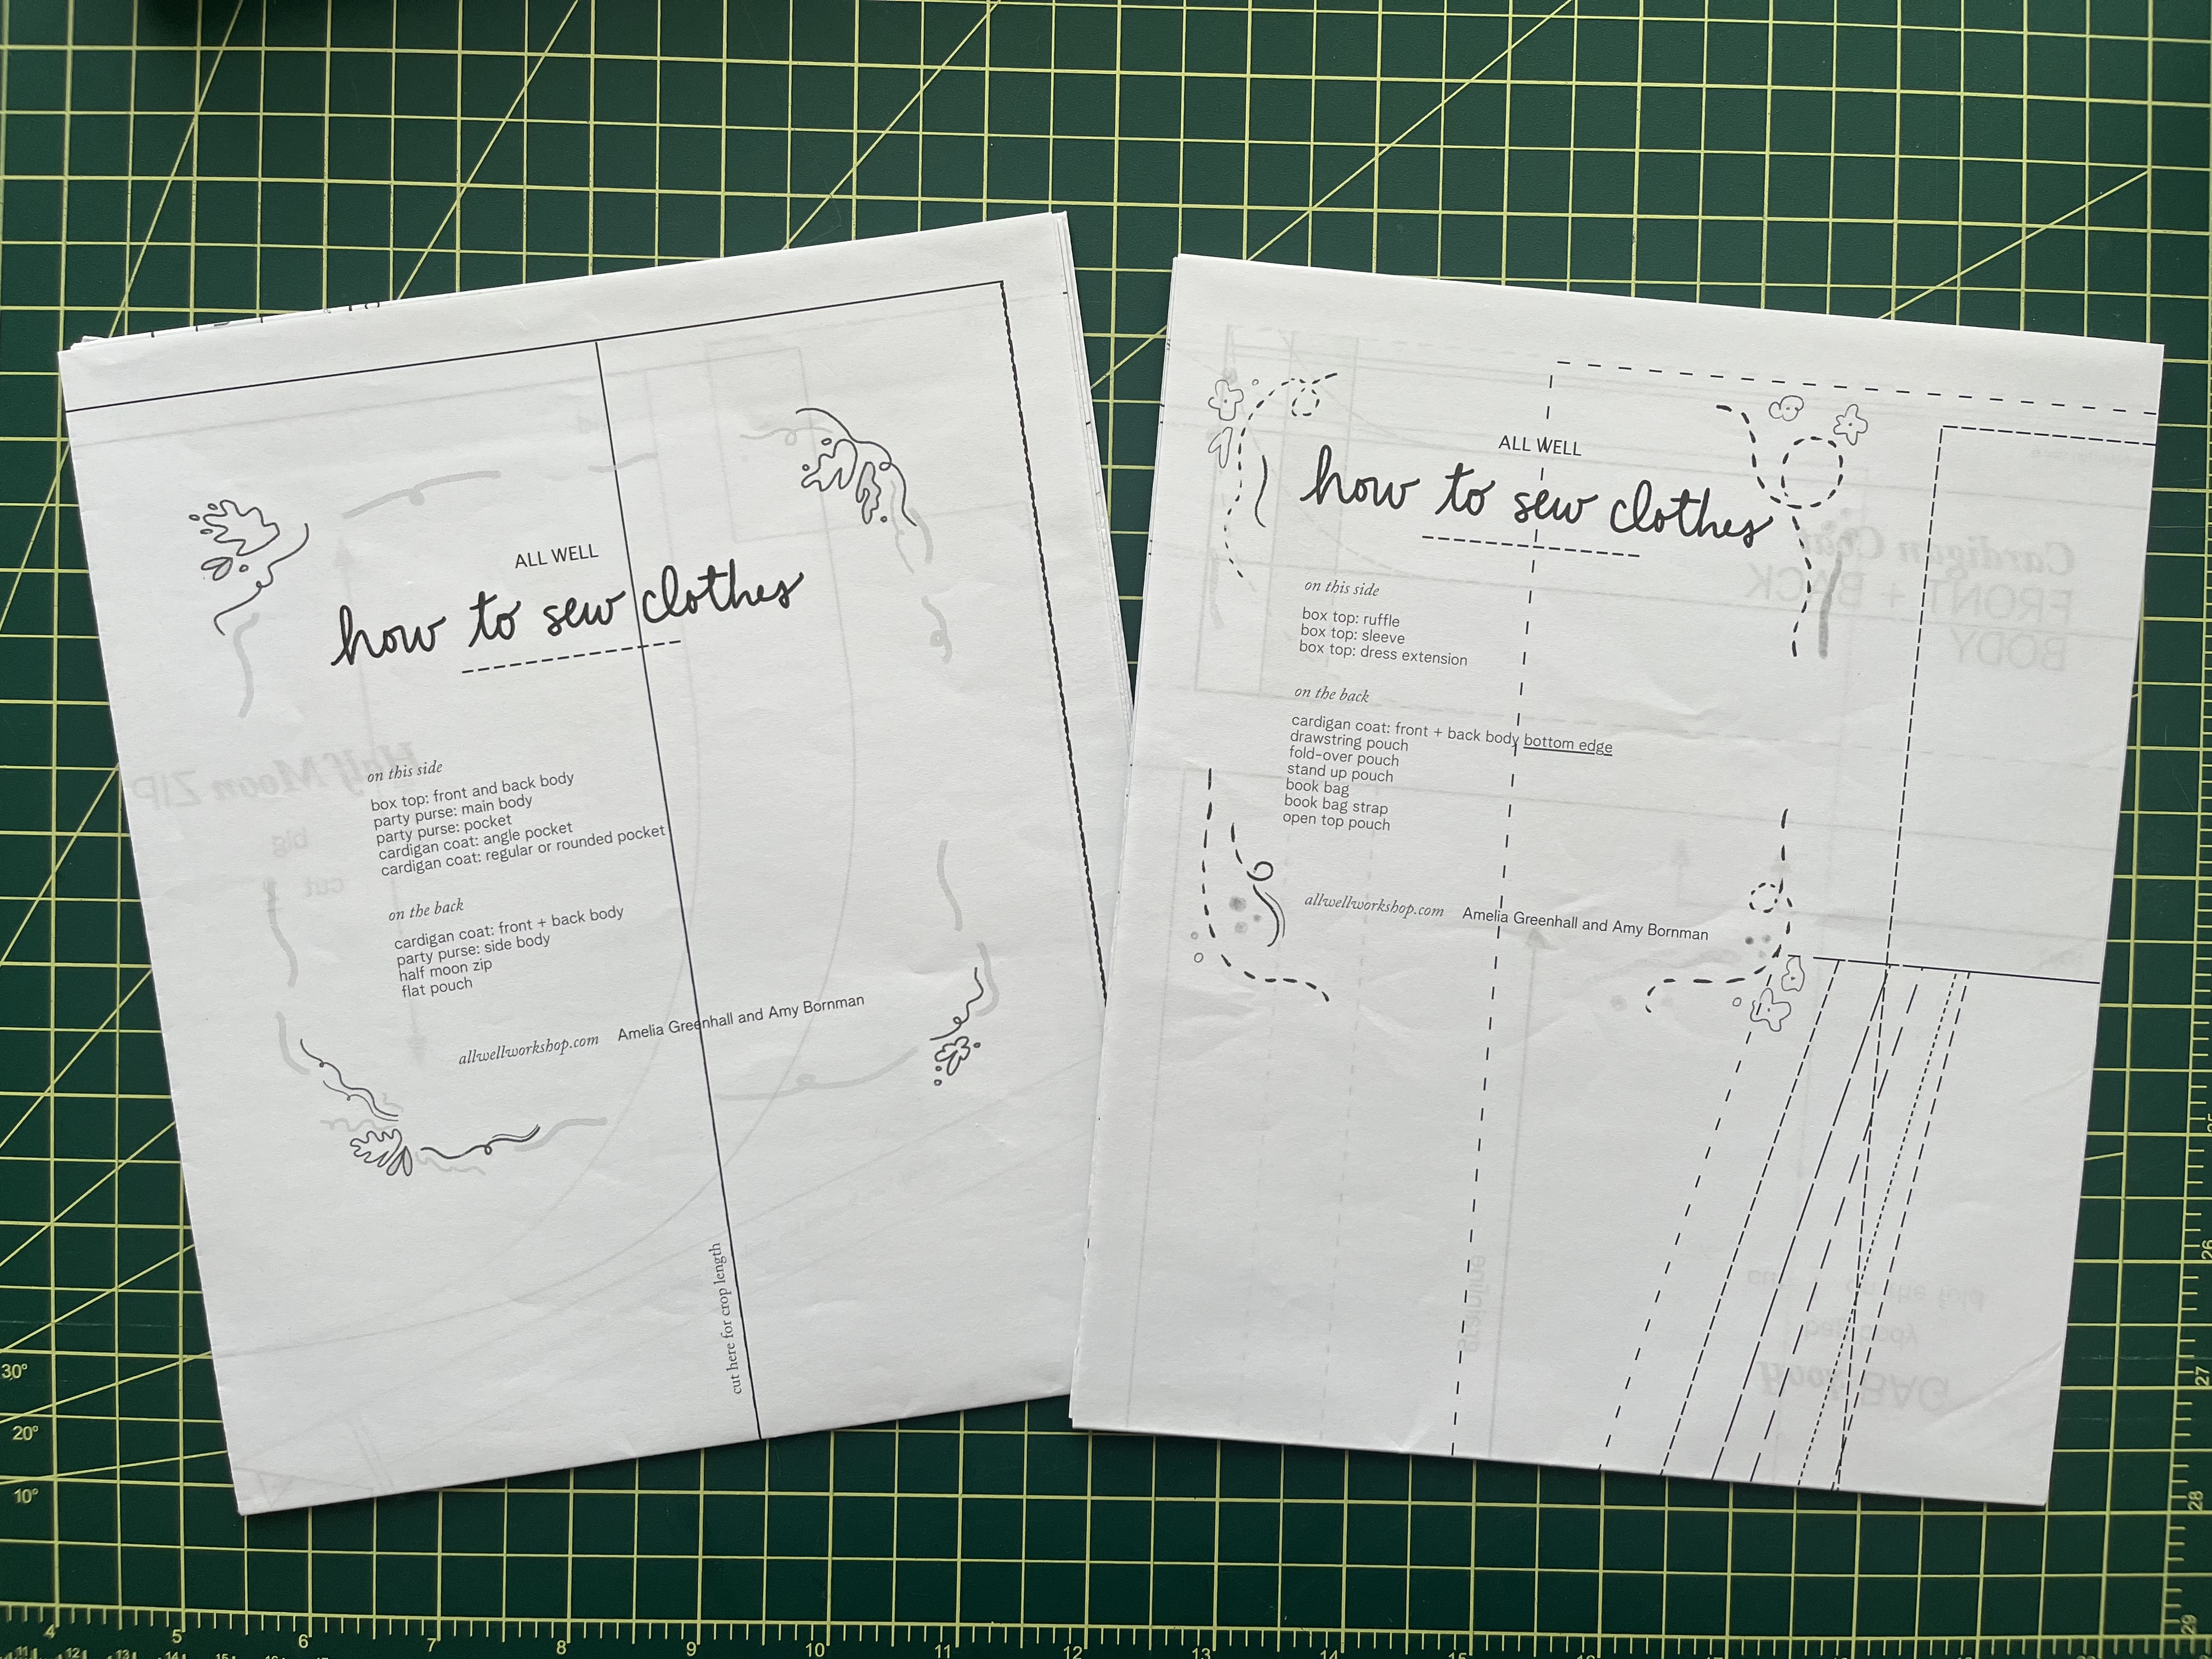
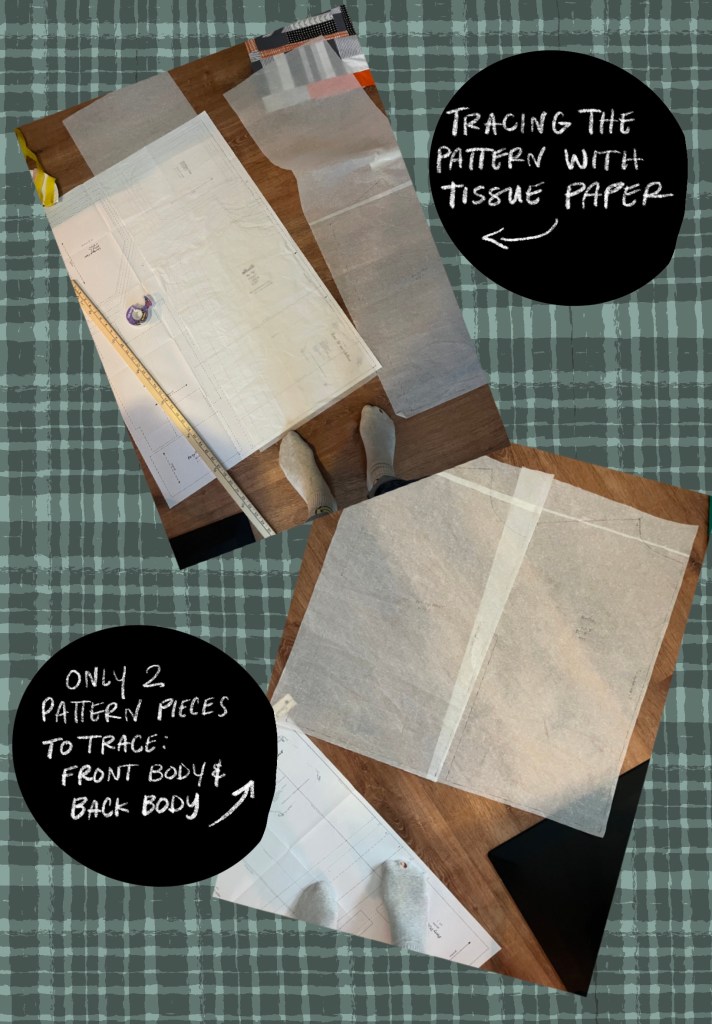
In the first full week of autumn 2023 I started working on my first garment. I chose what looked to be the absolute simplest garment I could, and that’s the Box Top from All Well Workshop. All Well is a collab between Amy Bornman and Amelia Greenhall. They sell patterns on Etsy (and their own site has a pay-what-you-can for their studio pants pattern) and they have a newish book (published by Abrams February 2023) titled How To Sew Clothes. They both have their own Substack newsletters found here and here, as well as an All Well newsletter found here. I subscribe to them all, they’re both great writers and have interesting, valuable things to say about creating. I cannot for the life of me remember how I found out about All Well Workshop but I’m so glad I did! This book came at just the right time for me. In April 2023 I set up my home office space into my sewing studio because of a burning desire to start quilting again. I hadn’t sewn since 2017 (except for a hand sewn felt alphabet I made for my kid in the beginning of 2021). I’ve kept up my sewing practice ever since spring of 2023, more or less, but it wasn’t until the fall that I finally had a desire to start making my own clothes. I picked up the book How To Sew Clothes from my local indie bookstore (*PLEASE CLAP*) and dove in. It’s so approachable and truly a perfect guide for the complete beginner garment sewist such as myself.
Buy it from your indie bookseller today
Two big sheets of patterns come with the book; tracing your patterns is necessary!
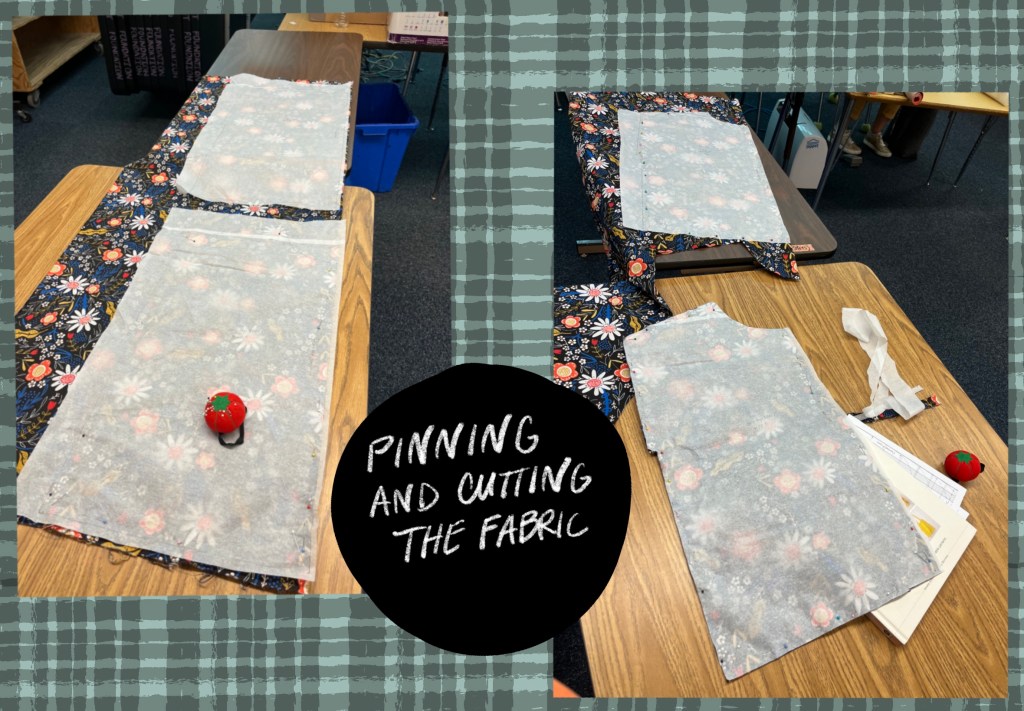
When you start making a new garment in a new-to-you pattern most experts tell you to make it out of muslin first so you don’t cut into your “good”/expensive fabric in case the fit is off. Did I do that? No. I did not do that. I just wanted to start and hope for the best that I measured myself correctly and selected the correct pattern size. This time it worked out for me so no regrets, it’s nice and boxy and what I expected! What I wish I had done, though, is take a beat and actually decide if the fabric I selected for the project made sense for me. Where was I planning on wearing this top? What would I wear with it? Do I even like the print I chose for a garment?? The answer to that last question is a no, unfortunately, but I didn’t realize this until I started sewing and then decided I might as well finish and see if it fit well.
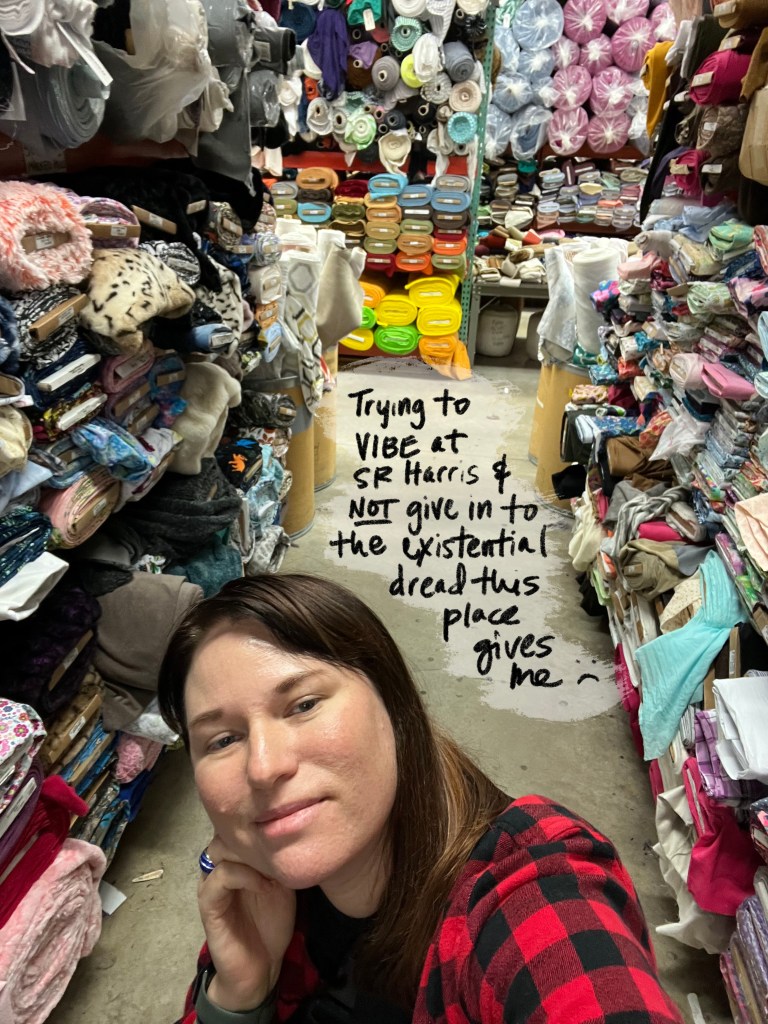
I found the fabric I used for the box top while shopping at SR Harris (the chaotic one in Brooklyn Park, MN. If you’ve been, have you ever given thought to how many dead rodents are probably in that place? Sorry!). When I saw it my immediate thought was “cute print”! SR Harris doesn’t seem to usually carry fabrics like that there. It’s a print called Birdsong: July Floral in Raven by the designer Gingiber for Moda. It IS a cute print but there’s just something about it that I don’t like. It’s too busy for my taste, I suppose? I don’t usually wear florals either so I don’t know what I was thinking getting it for a shirt. It’s also a quilting cotton so it’s not exactly the softest, nicest textile to have against your skin. If I were making this shirt again for the first time I would’ve chosen a solid fabric or a simple grid or plaid patterned fabric and maybe not a quilting cotton (it is easy to work with though!). Maybe you’re seeing the photos and you like it and I love that for you. It’s a cute fabric and I could totally see myself using some of the leftovers I have in a quilt. But for me, I just wish I had made a boring black shirt.
I can’t help it OK?
Since this was my first time sewing a garment I wanted to have help available if I ran into trouble. Normally I would turn to my mom for assistance who is a great sewist and knows her stuff but we don’t live in the same city. I know other people who sew but I also didn’t want to be a bother. When browsing the adult enrichment community education class catalog I came across the perfect class for my needs called Sewing Workshop. It was 3 consecutive Thursday evenings and each class was 2 hours and 45 minutes long. The great thing about this class is that you can work on whatever you want and an experienced, knowledgeable instructor is there to help you if you get stuck. All you need to bring to class is your own pattern, fabric, and notions; if you don’t have a machine (or don’t want to haul yours there) they have sewing machines and sergers available too. I found out after I signed up that many of the students are repeat customers, having signed up for the class several times before. Some just find it helpful to have that time carved out of their schedule in a place away from their home to work on their sewing projects. It was also really energizing to see so many of us working on different things–one woman was tackling overalls for her partner, another was making pillowcases and most of the rest of us were making tops.
Continuous bias binding fail, we gave up
I regret not writing about the minor hiccups I encountered sewing the box top at the time they happened because I’ve forgotten them all now. The one thing I do remember happening is during class my machine suddenly started to make a funny noise while sewing that it wasn’t making before. The instructor inspected it and decided what if we just tried changing out the needle for a brand new one? Admittedly I wasn’t sure when I last changed the needle. Thankfully that did the trick and the noise disappeared.
I think the average person who makes this top would finish it way faster than I did. It took me all 3 classes plus extra time at home to finally complete the box top, but I did it! In hindsight that’s kind of embarrassing it took so long to make such a simple garment but we all have to start somewhere. I did all but the bias binding around the neck opening during class time. When my mom was in town for a visit she was able to help me complete the bias around the neck as I found that to be the most challenging part of the pattern. I tried probably 3 times to make my own continuous bias binding out of the same fabric as the shirt and failed each time. All Well even has a video tutorial on how to make this but it didn’t work out for me so I just bought some black bias tape and called it a day. This skill is definitely on my list of things to learn though.
If you want a peek into the book before buying I found this YouTube video of a woman basically flipping through the book with commentary to show off the different things you can learn (or get it from your library! I know my library system has a few copies). The book is only tops/dresses/jackets and bags so if you were hoping to sew some pants, a jumpsuit, shorts, etc this is not the book for you! For the most part I liked the illustrations of the steps but sometimes, some steps are just better suited to a photo so there were times I wished those were included.
Will I make another All Well Workshop box top? I absolutely want to and I want to try some of the variations on the top that they offer in the book. Next time I’ll:
Choose a solid or simpler patterned fabric
Maybe try color blocking the front?
Do a high/low hem
Make the box dress?
When I do, I hope to write about it. If you made it this far, thanks for reading!